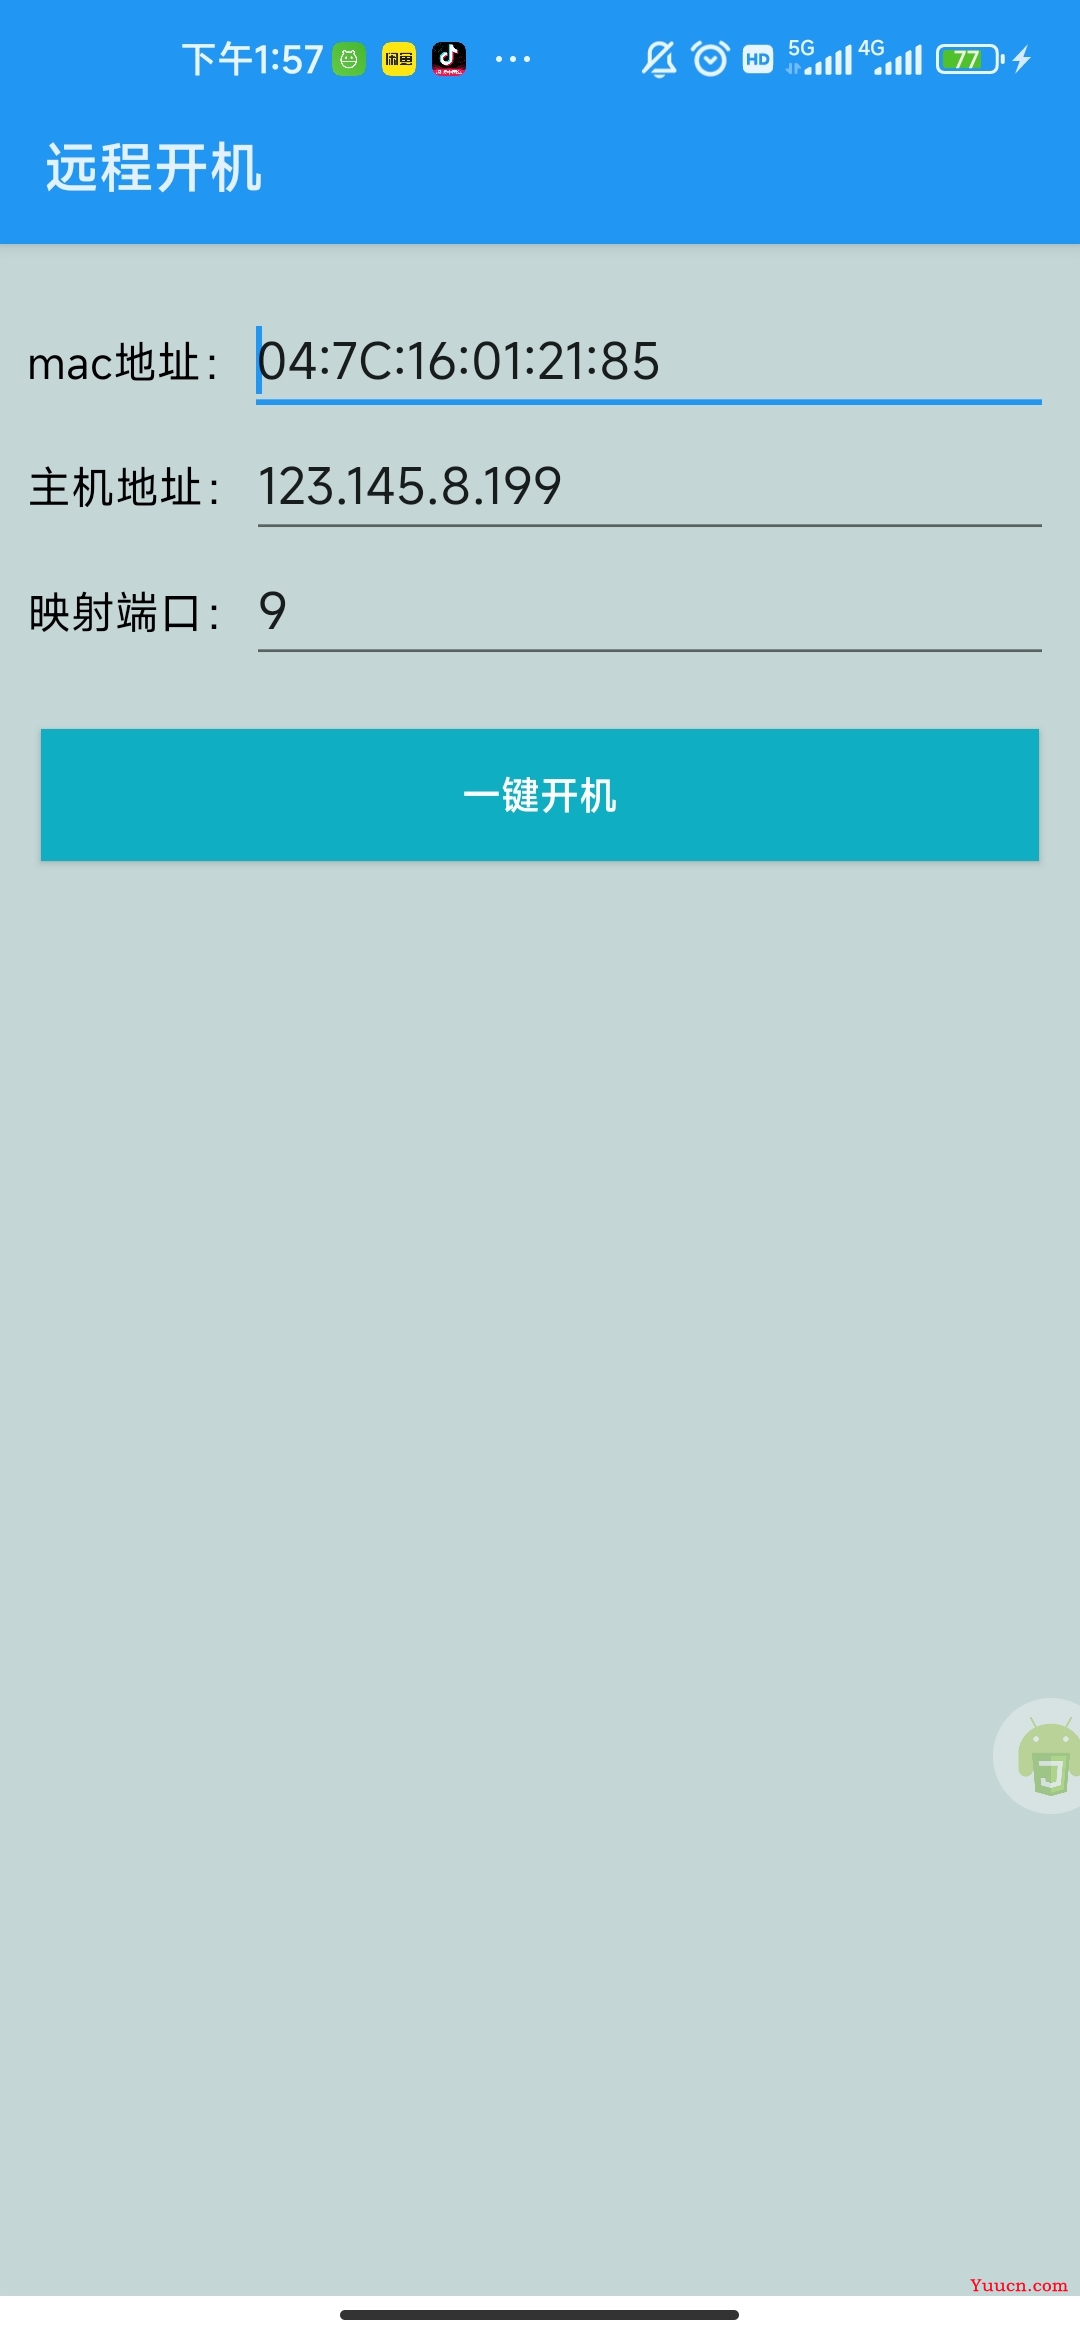
一、最终效果
远程开机app下载:
下载链接:https://wwp.lanzoup.com/iDR330ml4l2b
提取码 : dxcg
注意:使用前请按照2.1的步骤设置电脑“
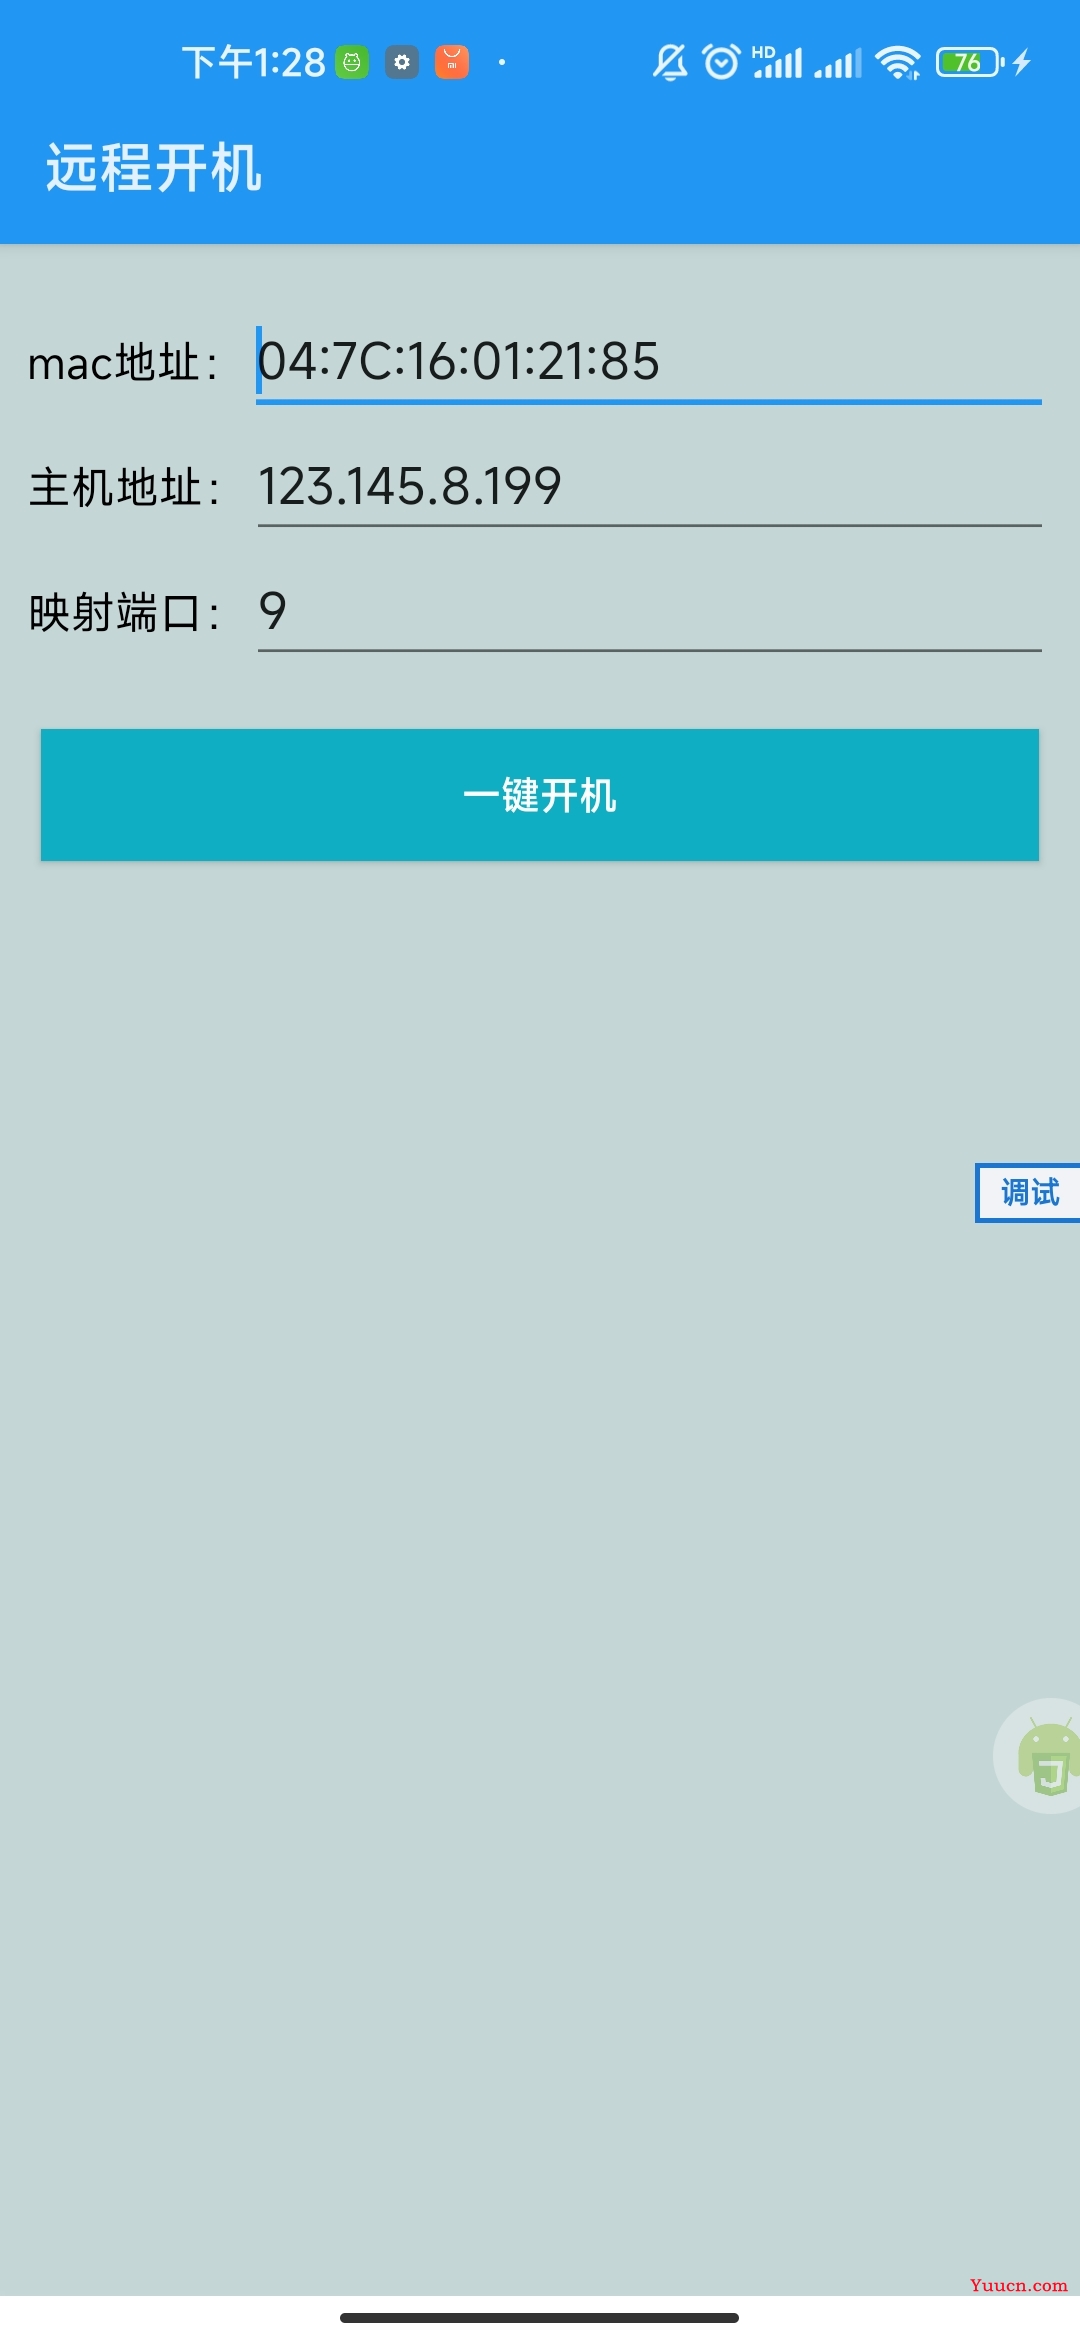
mac地址:填写自己的mac地址
主机地址:填写自己的公网ip,百度搜索ip
映射端口:第二点准备工作里面配置的映射端口
二、准备工作
2.1. 开启bios的wol远程唤醒功能
- 常见组装机主板
| 主板品牌 | 启动按键 |
|---|---|
| Intel主板 | F12 |
| 昂达主板 | F11 |
| 顶星主板 | F11或F12 |
| 富士康主板 | ESC或F12 |
| 冠盟主板 | F11或F12 |
| 冠铭主板 | F9 |
| 华擎主板 | F11 |
| 华硕主板 | F8 |
| 技嘉主板 | F12 |
| 杰微主板 | ESC或F8 |
| 捷波主板 | ESC |
| 精英主板 | ESC或F11 |
| 梅捷主板 | E5C或F12 |
| 铭瑄主板 | ESC |
| 譬正主板 | ESC |
| 七彩虹主板 | ESC或F11 |
| 双敏主板 | ESC |
| 斯巴达卡主板 | ESC |
| 微星主板 | F11 |
| 翔升主板 | F10 |
| 盈通主板 | F8 |
| 映奏主板 | F9 |
| 致铭主板 | F12 |
| 智英主板 | ESC |
常见笔记本品牌
| 笔记本品牌 | 启动按键 |
|---|---|
| eMachines笔记本 | F12 |
| Gateway笔记本 | F12 |
| IBM笔记本 | F12 |
| 东芝笔记本 | F12 |
| 方正笔记本 | F12 |
| 海尔笔记本 | F12 |
| 宏基笔记本 | F12 |
| 华硕笔记本 | ESC |
| 患晋笔记本 | F9 |
| 技嘉笔记本 | F12 |
| 截尔笔记本 | F12 |
| 联想Thinkpad | F12 |
| 联想笔记本 | F12 |
| 明基笔记本 | F9 |
| 苹果笔记本 | 长按"option"键 |
| 清华同方笔记本 | F12 |
| 三星笔记本 | F12 |
| 神舟笔记本 | F12 |
| 室士通笔记本 | F12 |
| 素尼笔记本 | ESC |
| 微星笔记本 | F11 |
- 台式机品牌
| 台式机品牌 | 启动按键 |
|---|---|
| 方正台式机 | F12 |
| 海尔台式机 | F12 |
| 宏基台式机 | F12 |
| 华硕台式机 | F8 |
| 惠昔台式机 | F12 |
| 截尔台式机 | ESC |
| 联想台式机 | F12 |
| 明基台式机 | F8 |
| 清华同方台式机 | F12 |
| 神舟台式机 | F12 |
注意:其他品牌请百度或尝试以上按键
进入BIOS后找一下有没有Wake On LAN 、远程唤醒、WOL等相关字样的选项,找到并启用。
如果还不知如何设置,百度搜索”主板型号+远程唤醒“
- 设置路由器
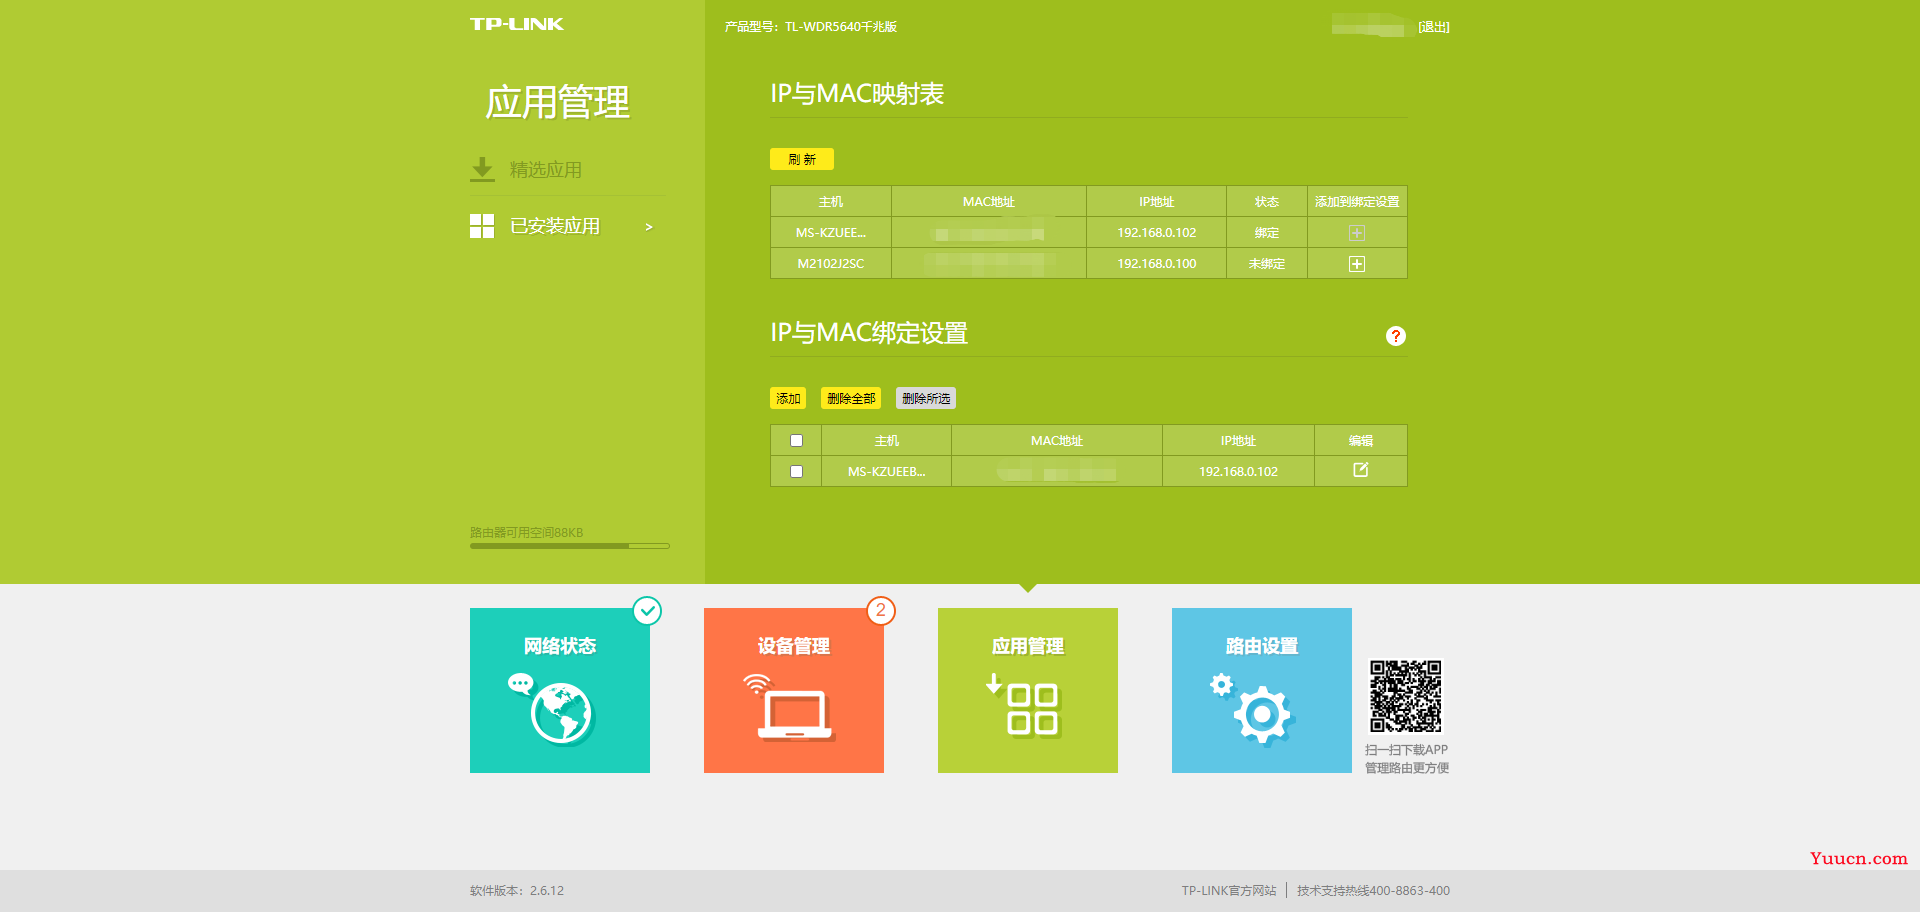
TP Link路由器设置如下,其余路由器设置类似,请自行百度。
- 设置IP与MAC绑定
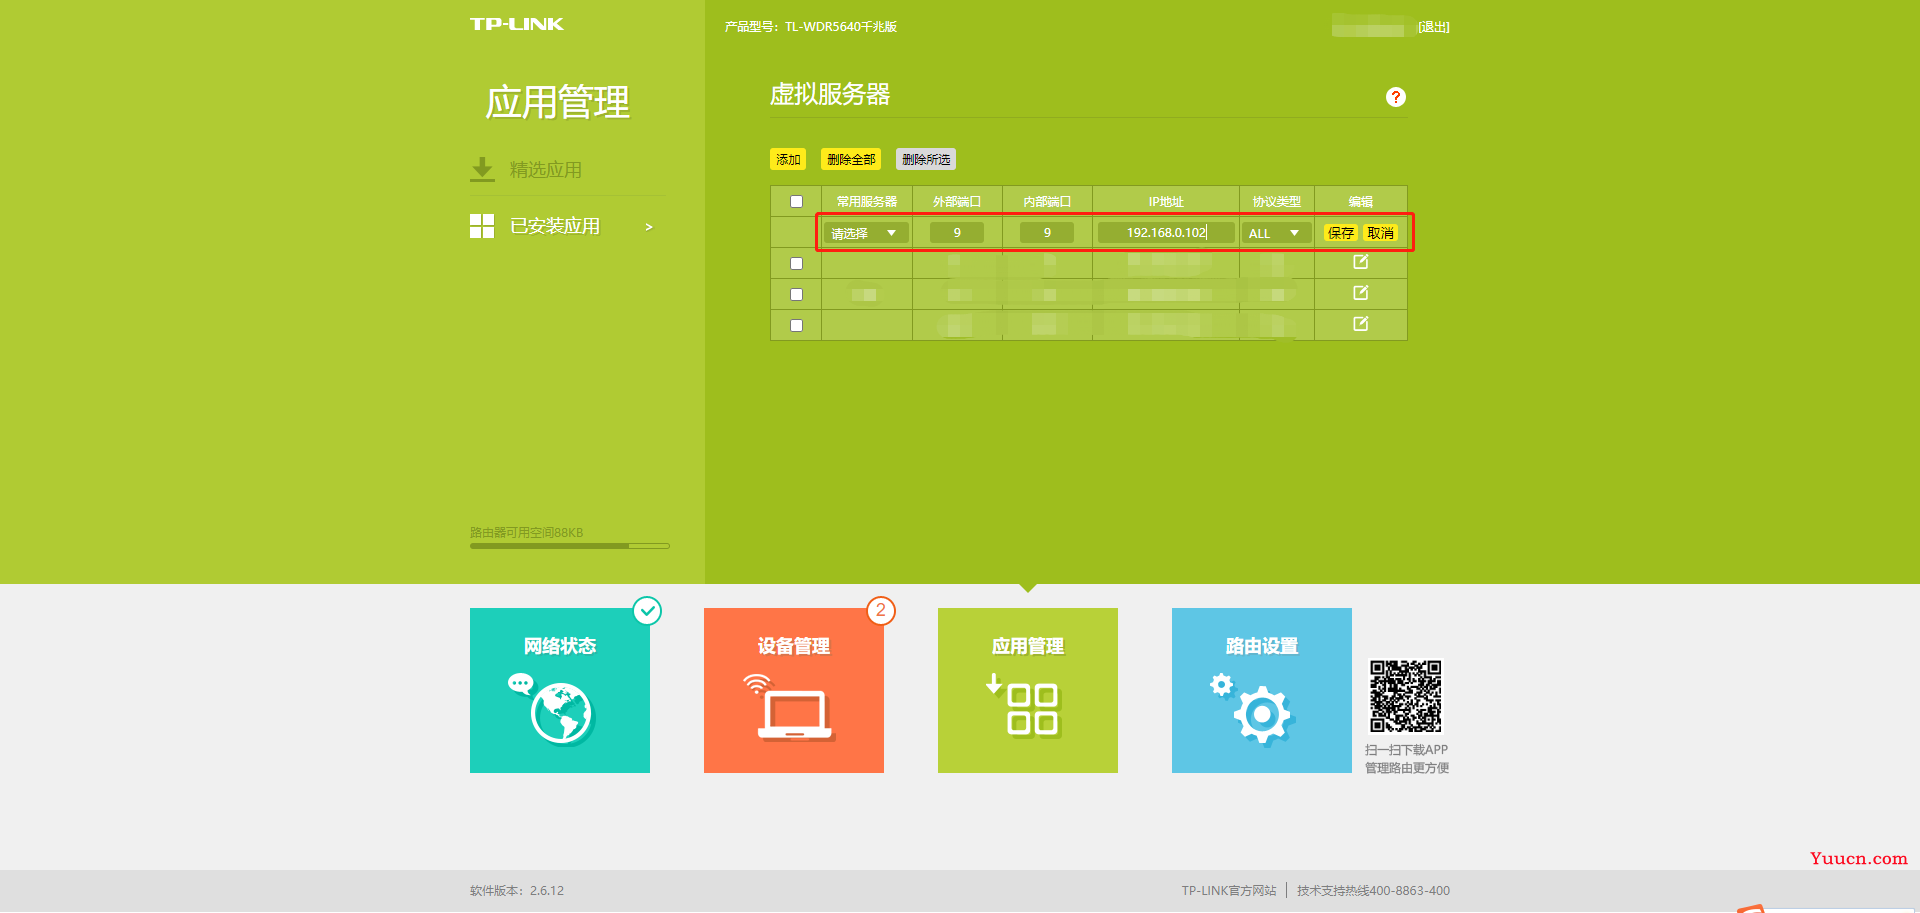
- 设置端口映射
注意内网IP与电脑的IP一致,就是刚才MAC绑定时的IP地址,端口任意选择,协议类型选择ALL或者UDP。
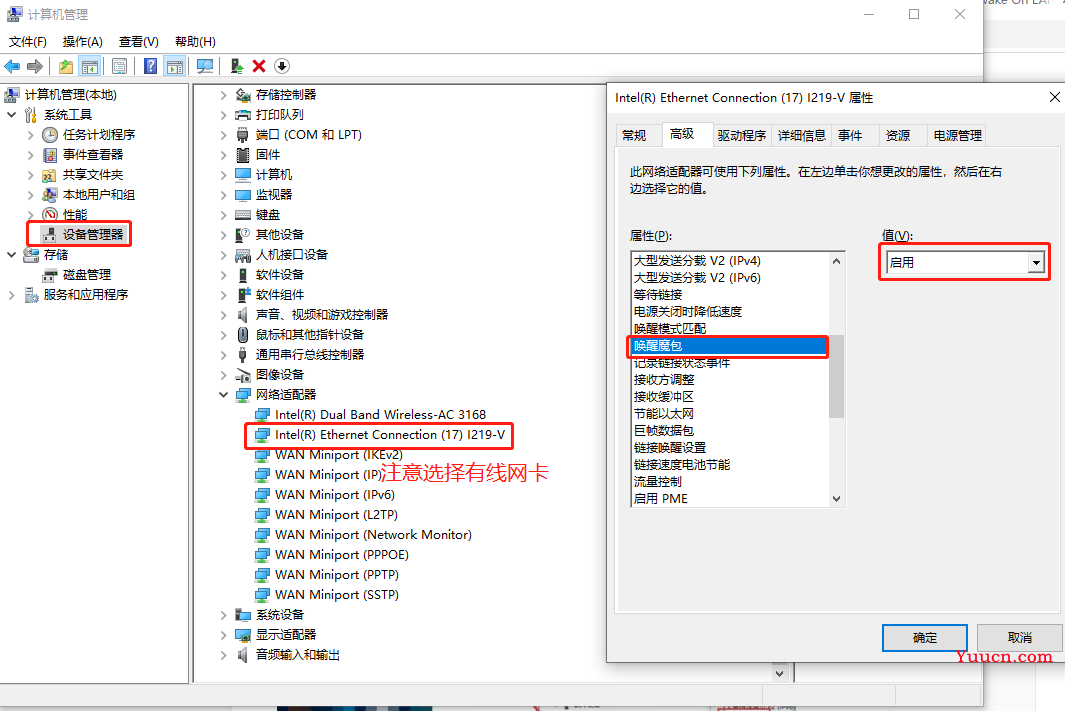
- 设置电脑
点击”此电脑->设备管理器->网络适配器",启用唤醒魔包。
2.2. 下载Andlua+软件
软件下载链接,关注【产品经理不是经理】gzh,回复【andlua+】即可下载。
三、实现代码
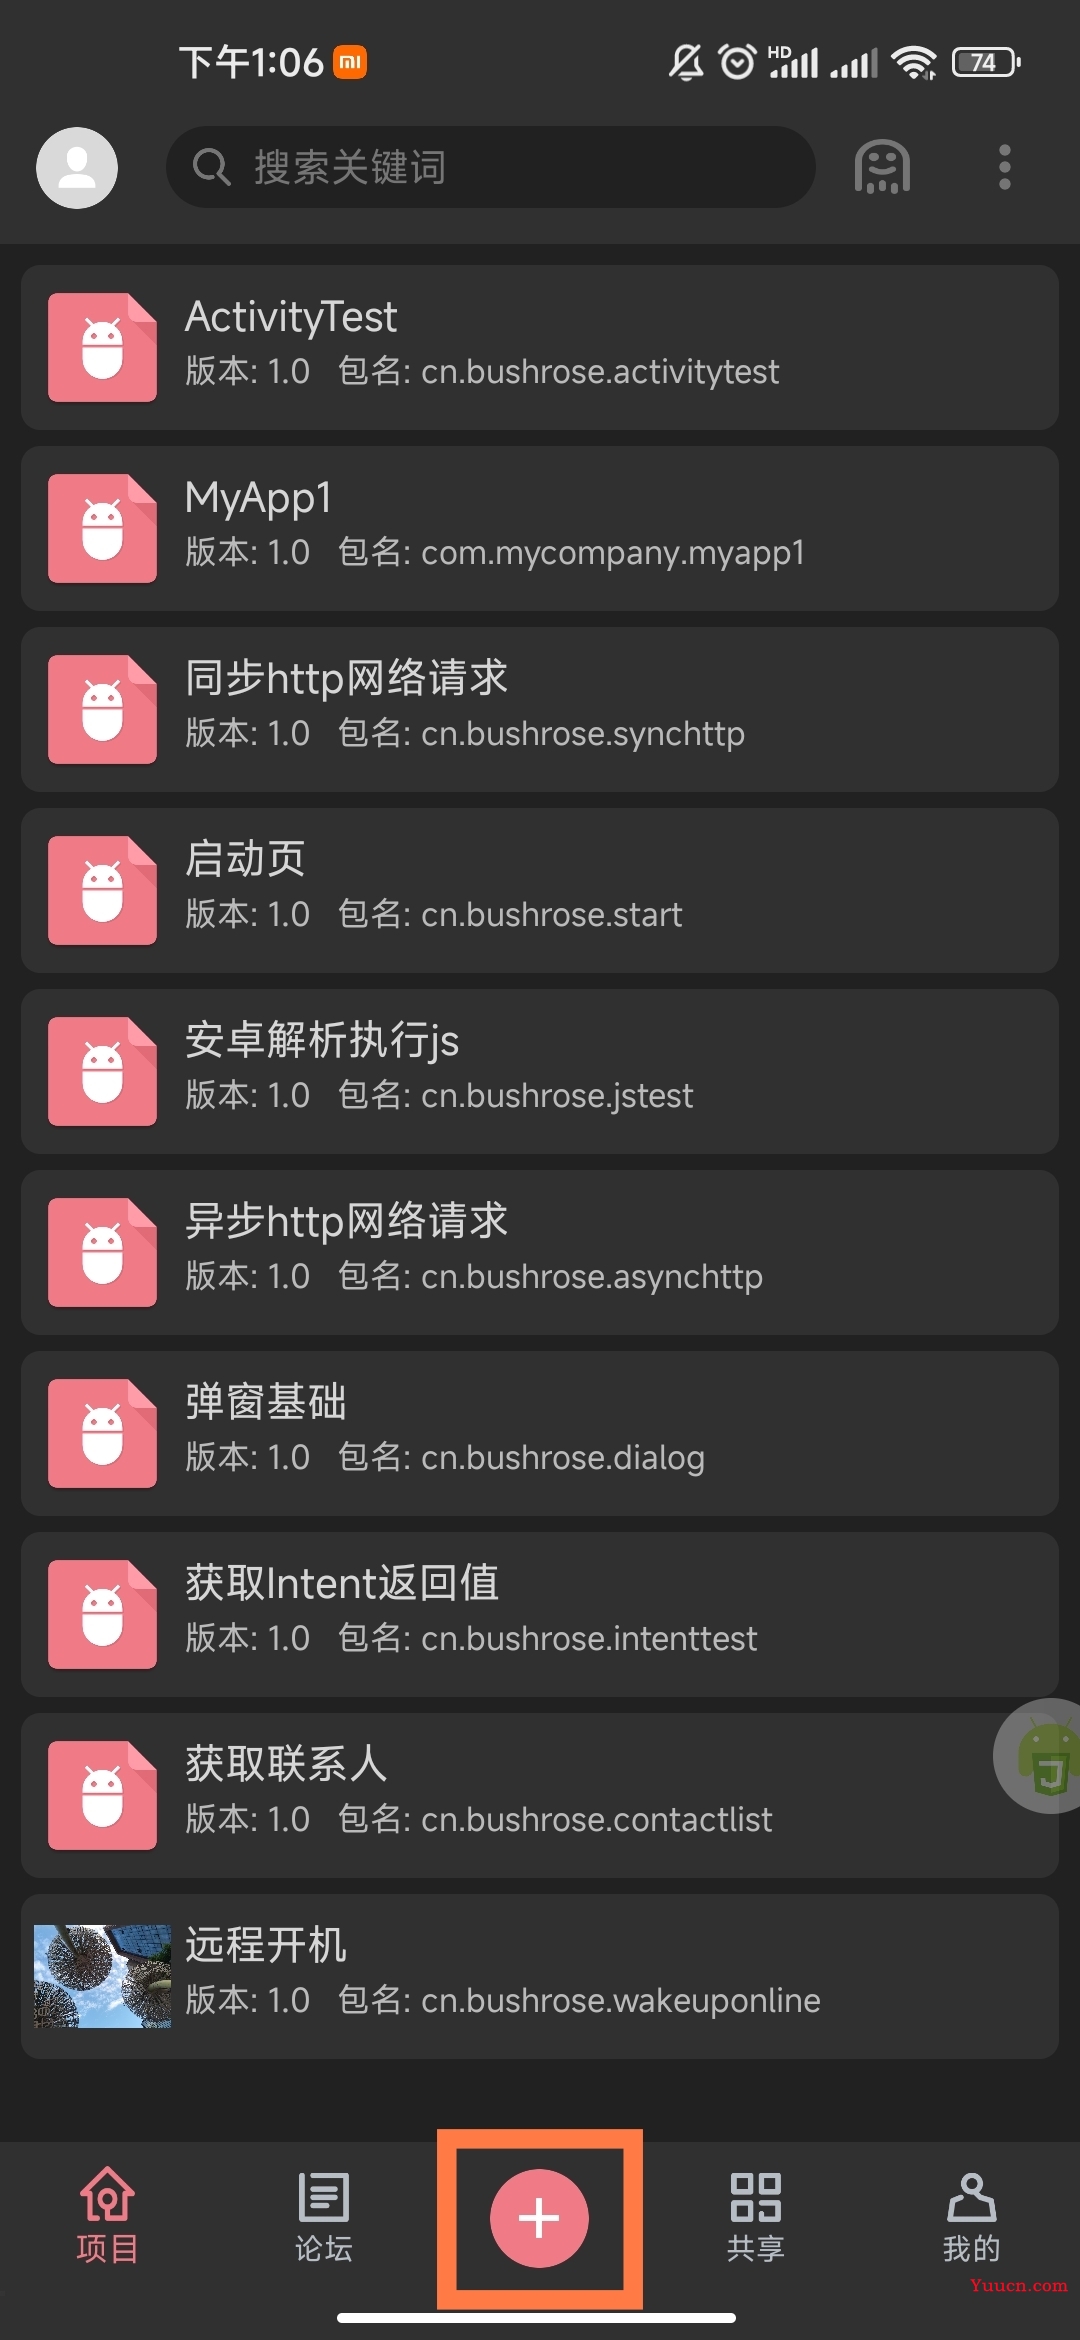
3.1. 打开软件,新建项目,创建步骤如下:
- 点击“+”号
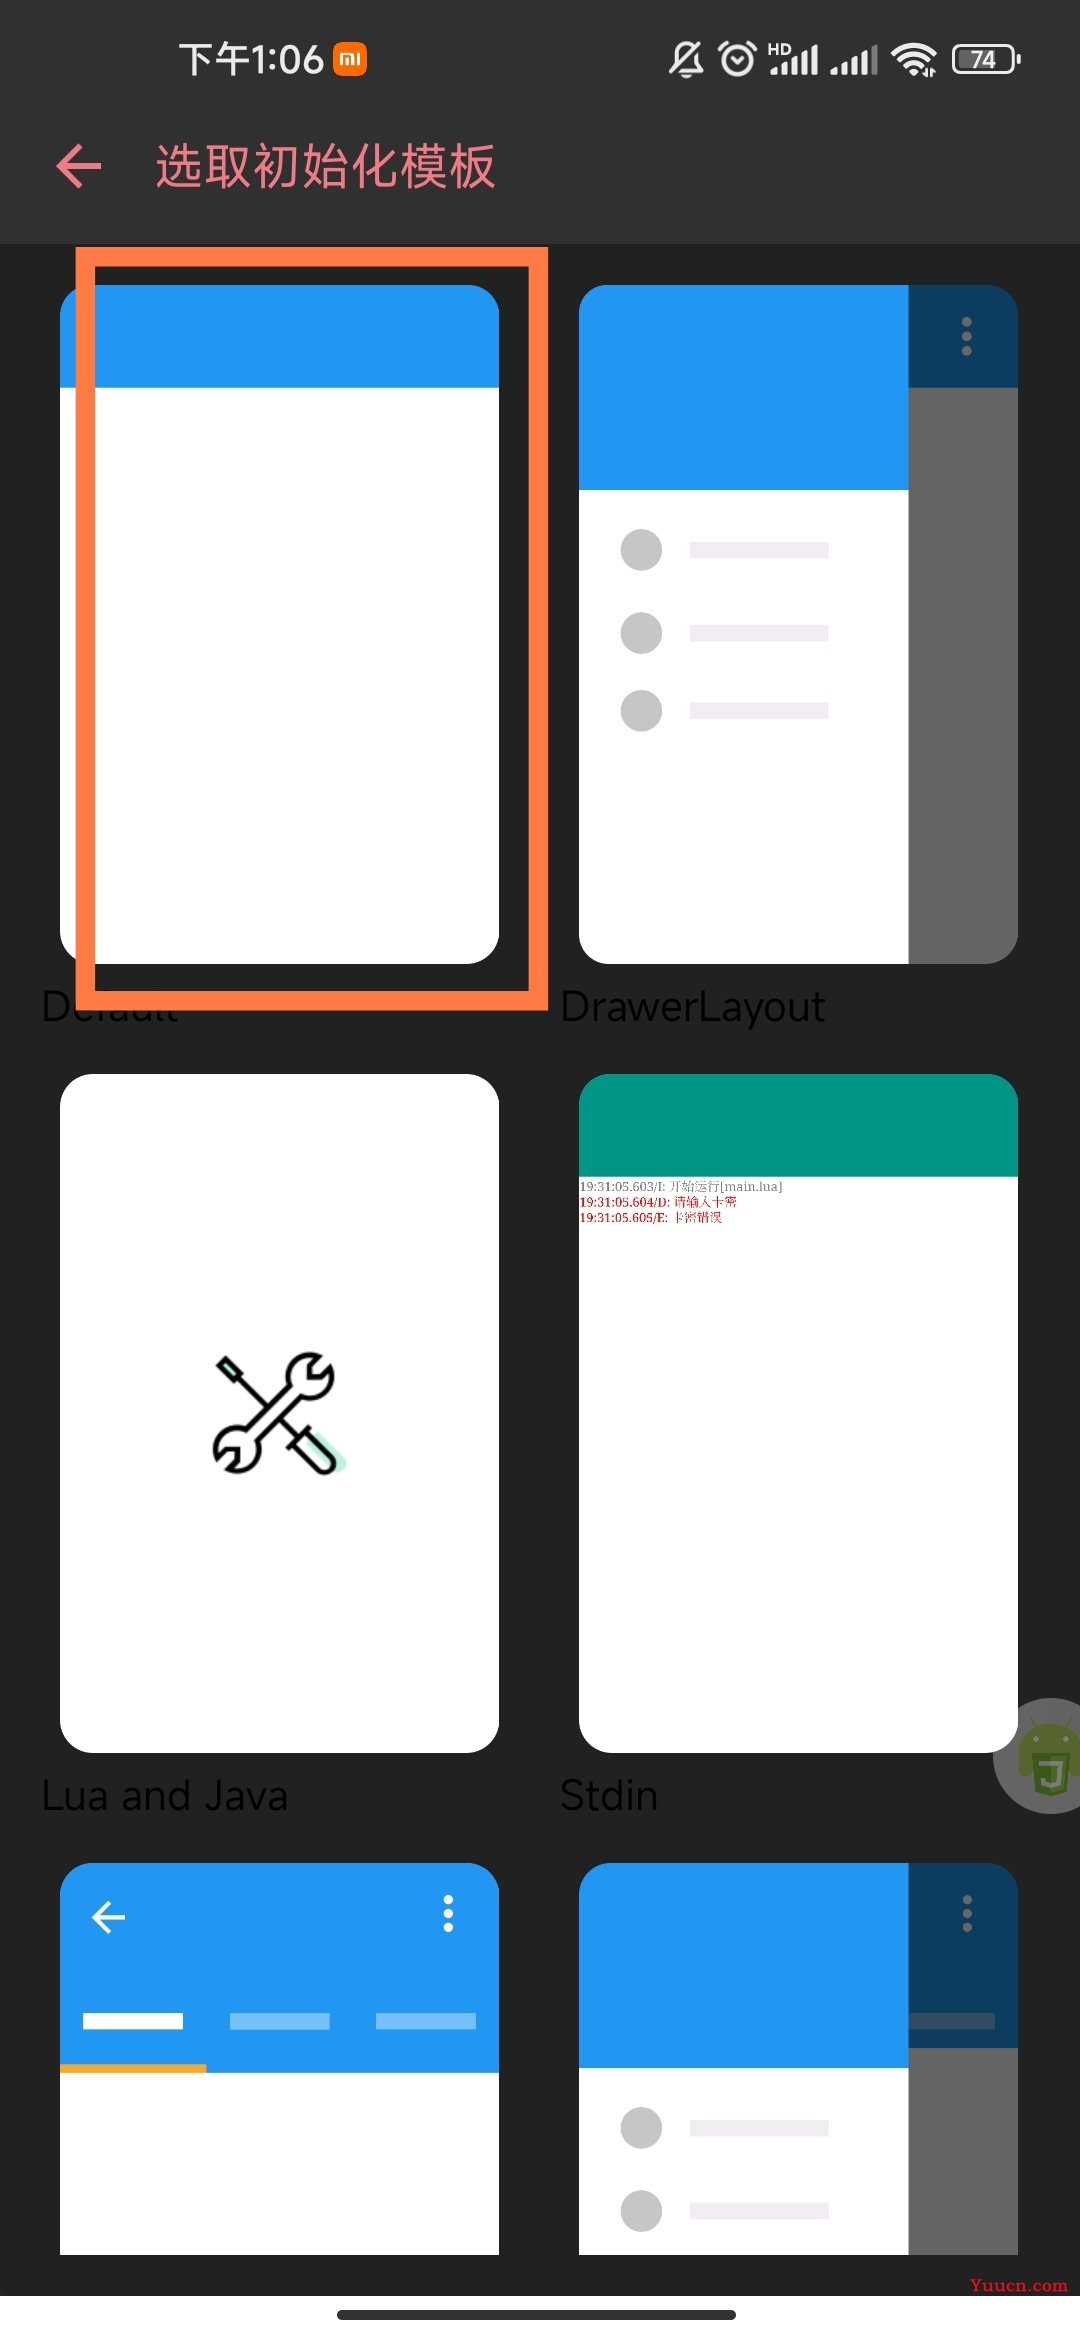
- 选择模板,这里我们选择空白模板。
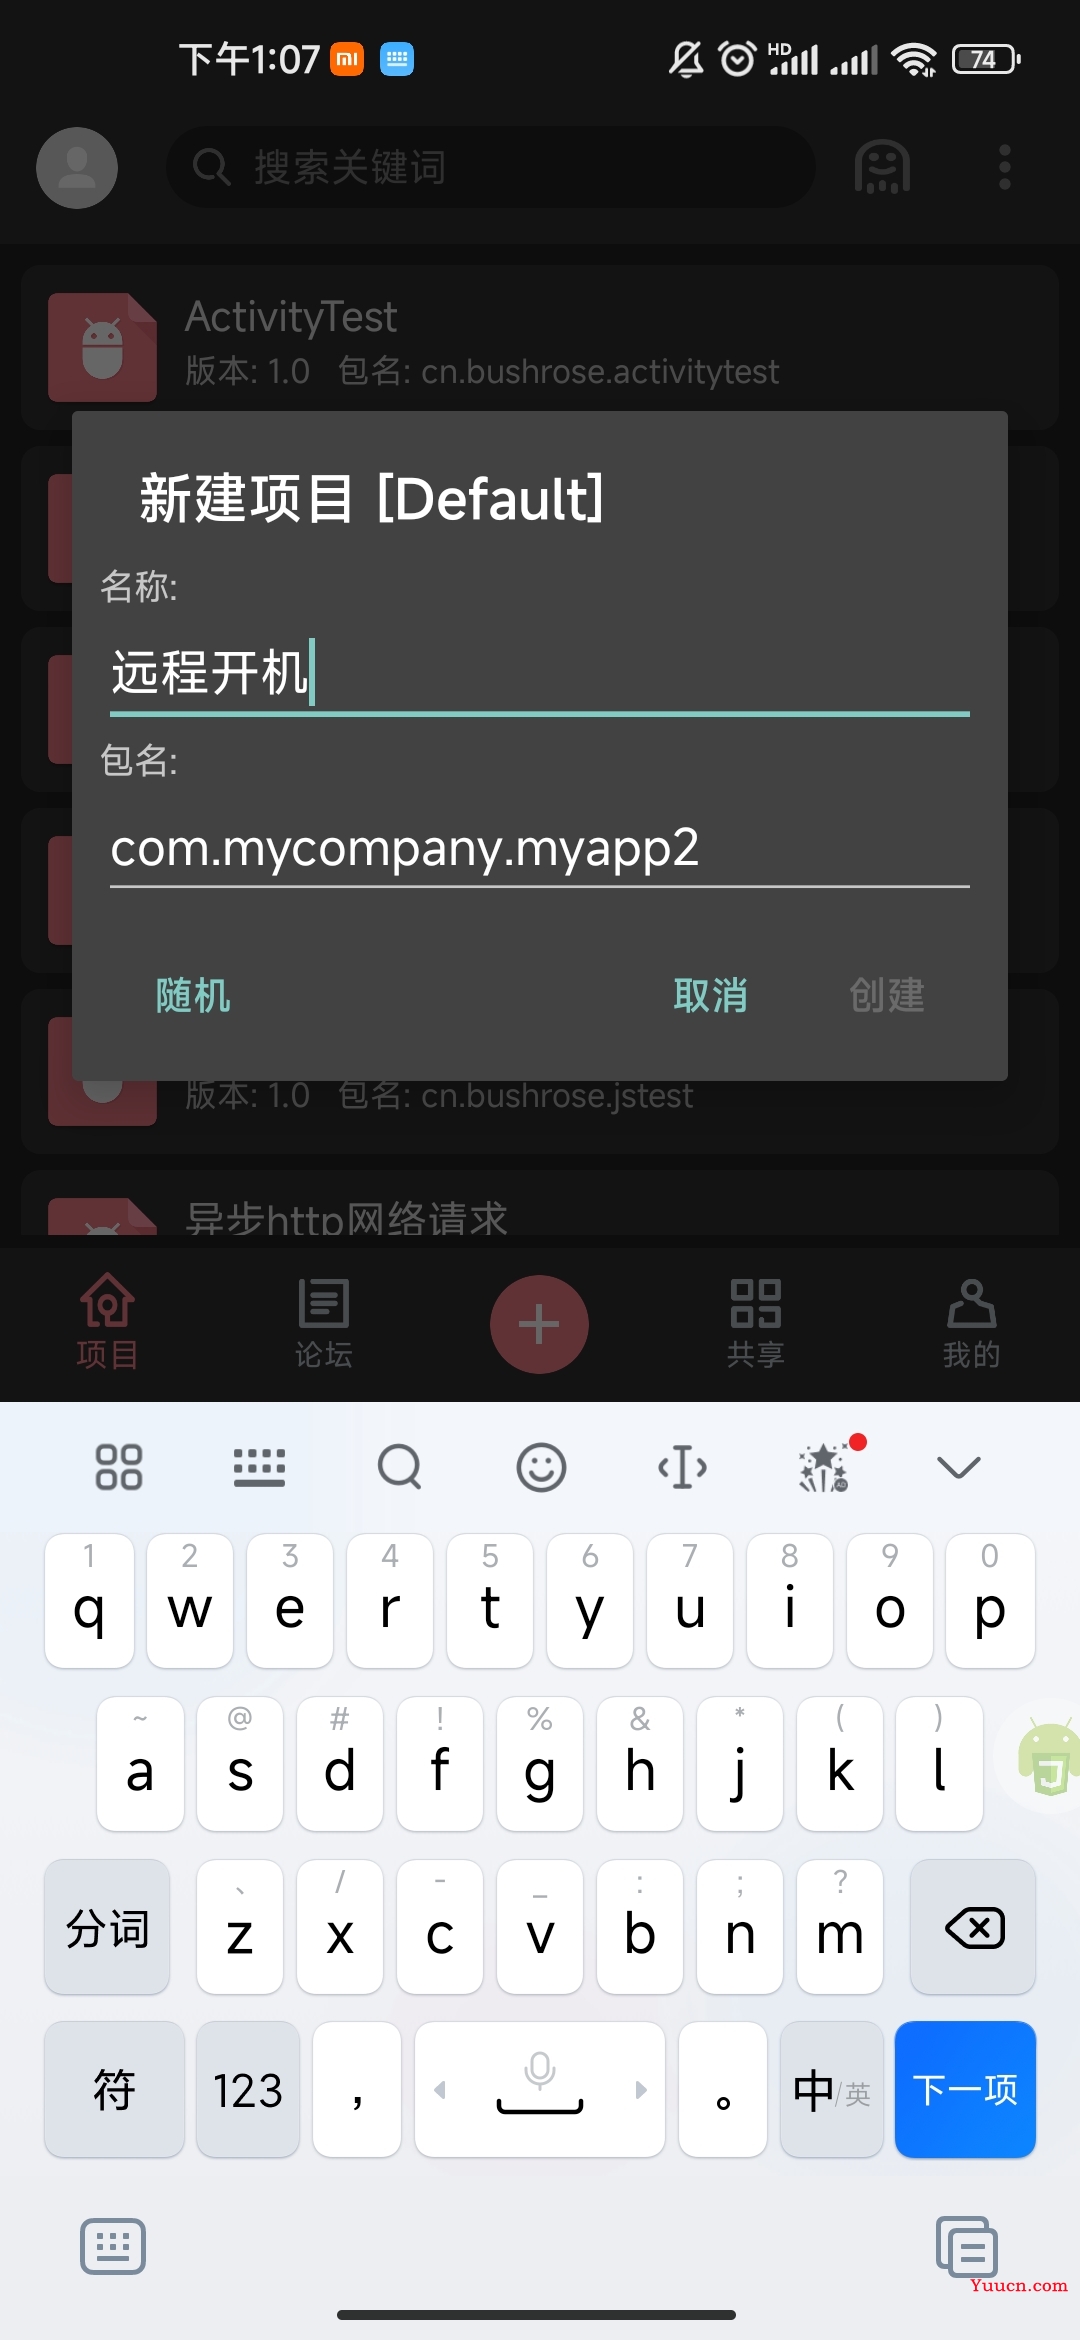
- 填写项目名称和包名。项目名称随便填,包名类似com.xx.xx,随意填写就行。
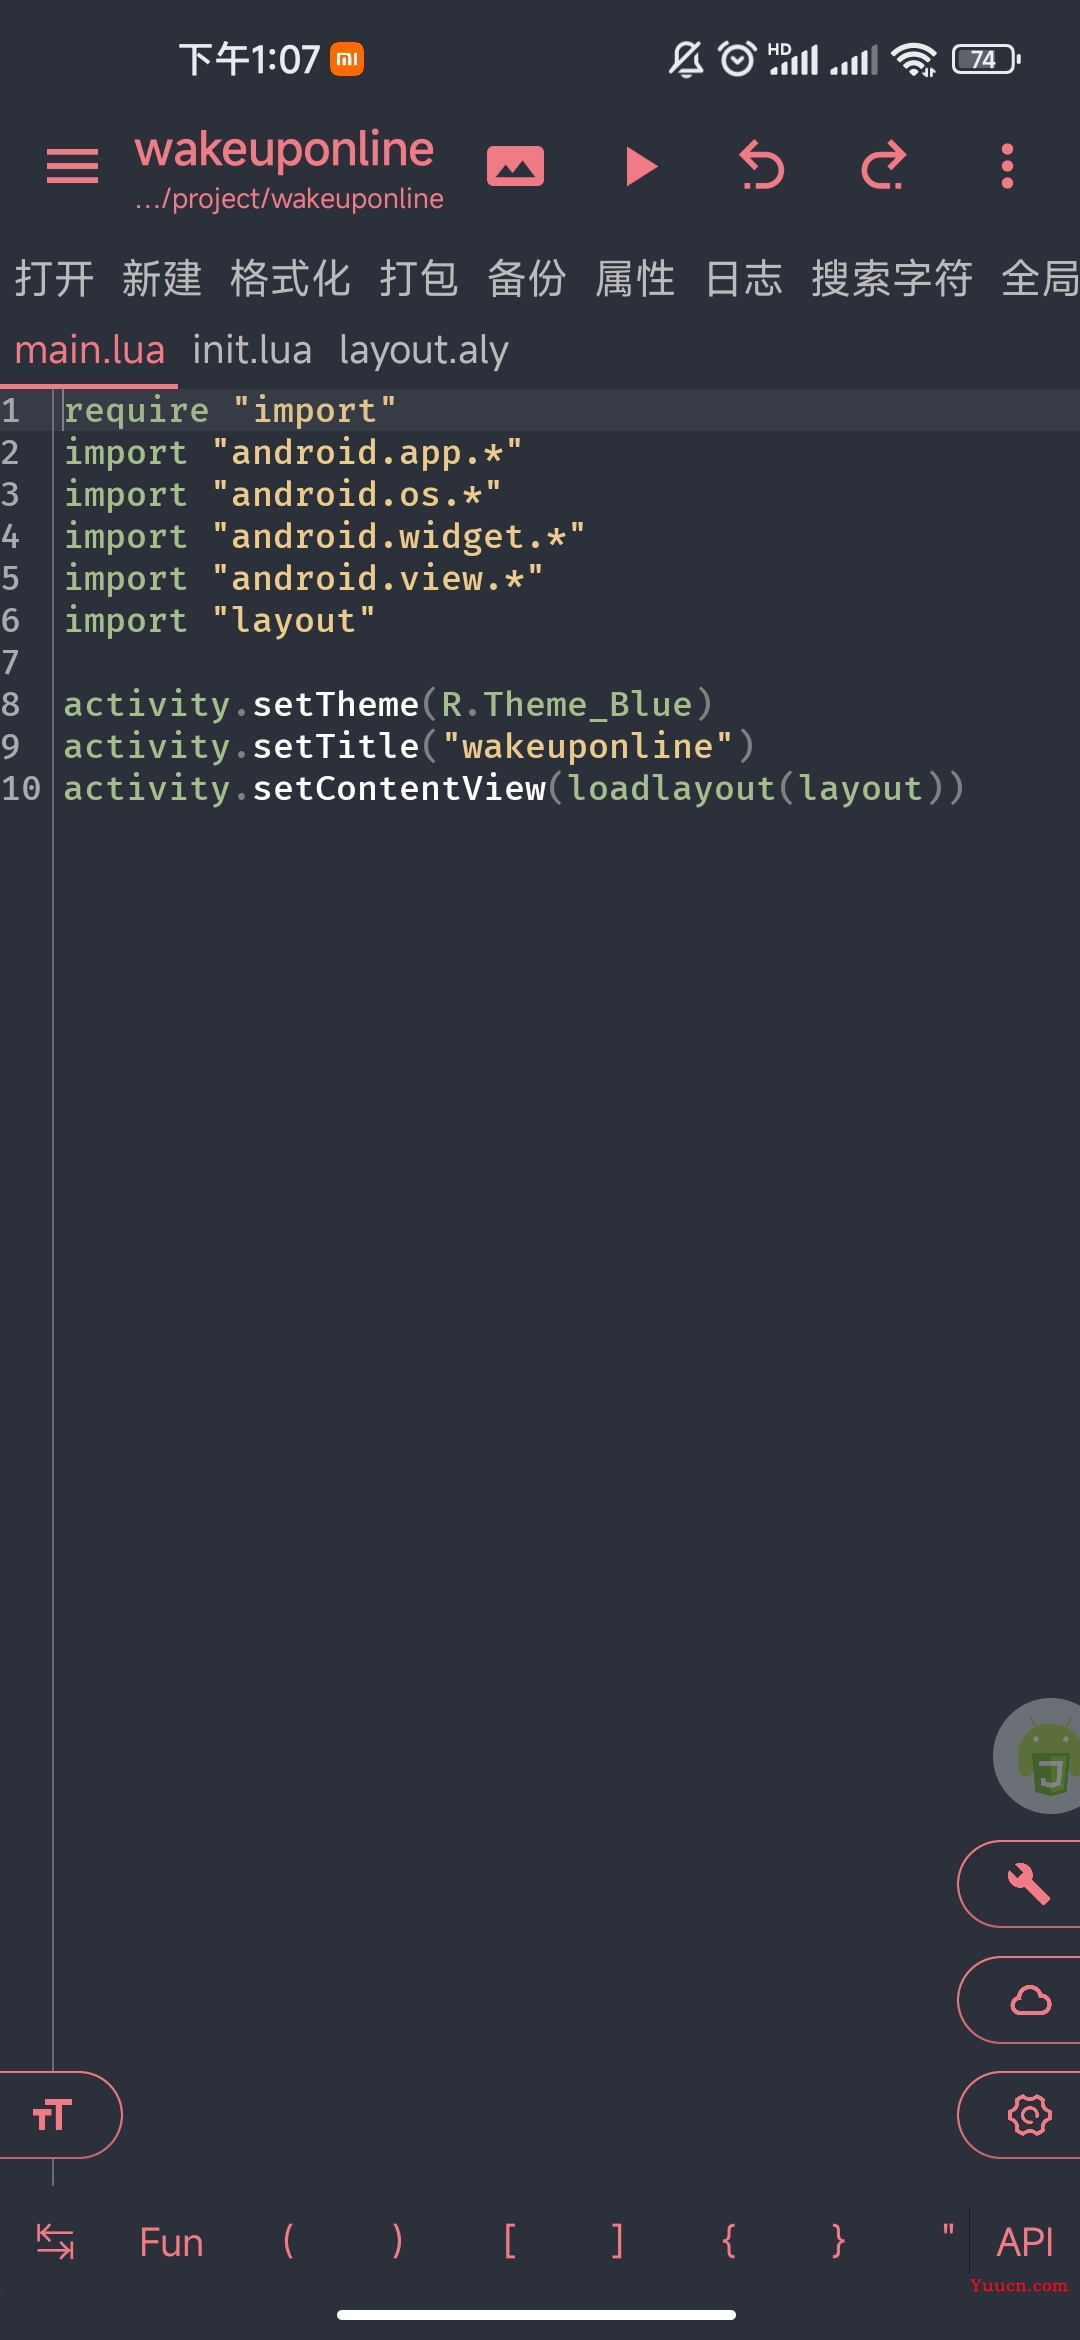
- 生成的模板代码如下:
3.2. 编写代码:
- main.lua代码如下:
require "import"
import "android.app.*"
import "android.os.*"
import "android.widget.*"
import "android.view.*"
import "layout"
import "socket"
activity.setTheme(R.Theme_Blue)
activity.setTitle("远程开机")
activity.setContentView(loadlayout(layout))
-- 将两个一组字符串表示的十六进制转为十六进制的字符串
-- 'ff'(66 66) -> 0xff -> '.'(255)
function to(str)
  ret = ''
  for i = 1, string.len(str), 2 do
    byte = ('0x' .. string.sub(str, 0 + i, 1 + i))
    a = tonumber(byte)
    ret = ret .. string.char(a)
  end
  return ret
end
function wakeUp(mac,bip,port)
  -- 要进行目标主机的MAC地址
  -- 路由器广播地址
  -- 映射端口
  mac=string.gsub(mac,":","")
  head = 'FFFFFFFFFFFF' -- 数据头
  head = to(head)
  mac = to(mac)
  for i = 1, 16 do
    head = head .. mac
  end
  u = socket.udp()
  u:sendto(head,bip,port)
  u:close()
  toast("魔术包发送成功")
end
-- 判断是否为空
function isEmpty(s)
  local flag=false
  if s==nil or s=="" then
    flag=true
  end
  return flag
end
-- 自定义toast
function toast(msg,activity,duration)
  local activity=activity or this
  local msg=msg or ""
  local duration=duration or Toast.LENGTH_SHORT
  Toast.makeText(activity, msg,duration).show()
end
btn.onClick=function()
  mac=tostring(macAddr.getText())
  host1=tostring(host.getText())
  port1=tostring(port.getText())
  if isEmpty(mac) or isEmpty(host1) or isEmpty(port1) then
    toast("mac地址、主机地址、端口均不能为空")
    return
  end
  wakeUp(mac,host1,port1)
end
- layout.aly代码如下:
{
  LinearLayout;
  orientation="vertical";
  layout_height="wrap_content";
  layout_width="match_parent";
  backgroundColor="0xffc4d7d6";
  {
    LinearLayout;
    layout_marginTop="20dp";
    layout_width="match_parent";
    {
      TextView;
      textSize="16sp";
      layout_marginLeft="10dp";
      layout_width="wrap_content";
      layout_height="wrap_content";
      textColor="0xff000000";
      text="mac地址:";
    };
    {
      EditText;
      text="04:7C:16:01:21:85";
      layout_width="match_parent";
      id="macAddr";
      layout_marginRight="10dp";
    };
  };
  {
    LinearLayout;
    layout_width="match_parent";
    layout_height="wrap_content";
    {
      TextView;
      textSize="16sp";
      textColor="0xff000000";
      layout_marginLeft="10dp";
      text="主机地址:";
    };
    {
      EditText;
      text="123.145.8.199";
      layout_width="match_parent";
      id="host";
      layout_marginRight="10dp";
    };
  };
  {
    LinearLayout;
    layout_width="match_parent";
    {
      TextView;
      textSize="16sp";
      textColor="0xff000000";
      layout_marginLeft="10dp";
      text="映射端口:";
    };
    {
      EditText;
      layout_marginRight="10dp";
      layout_width="match_parent";
      id="port";
      text="9";
    };
  };
  {
    Button;
    layout_marginLeft="15dp";
    id="btn";
    text="一键开机";
    layout_marginTop="20dp";
    backgroundColor="0xff10aec2";
    textColor="0xffffffff";
    layout_height="wrap_content";
    layout_width="match_parent";
    layout_marginRight="15dp";
  };
};
- init.lua使用模板代码,不做更改。
- 修改完成后,点击三角符号预览
3.2. 打包app:
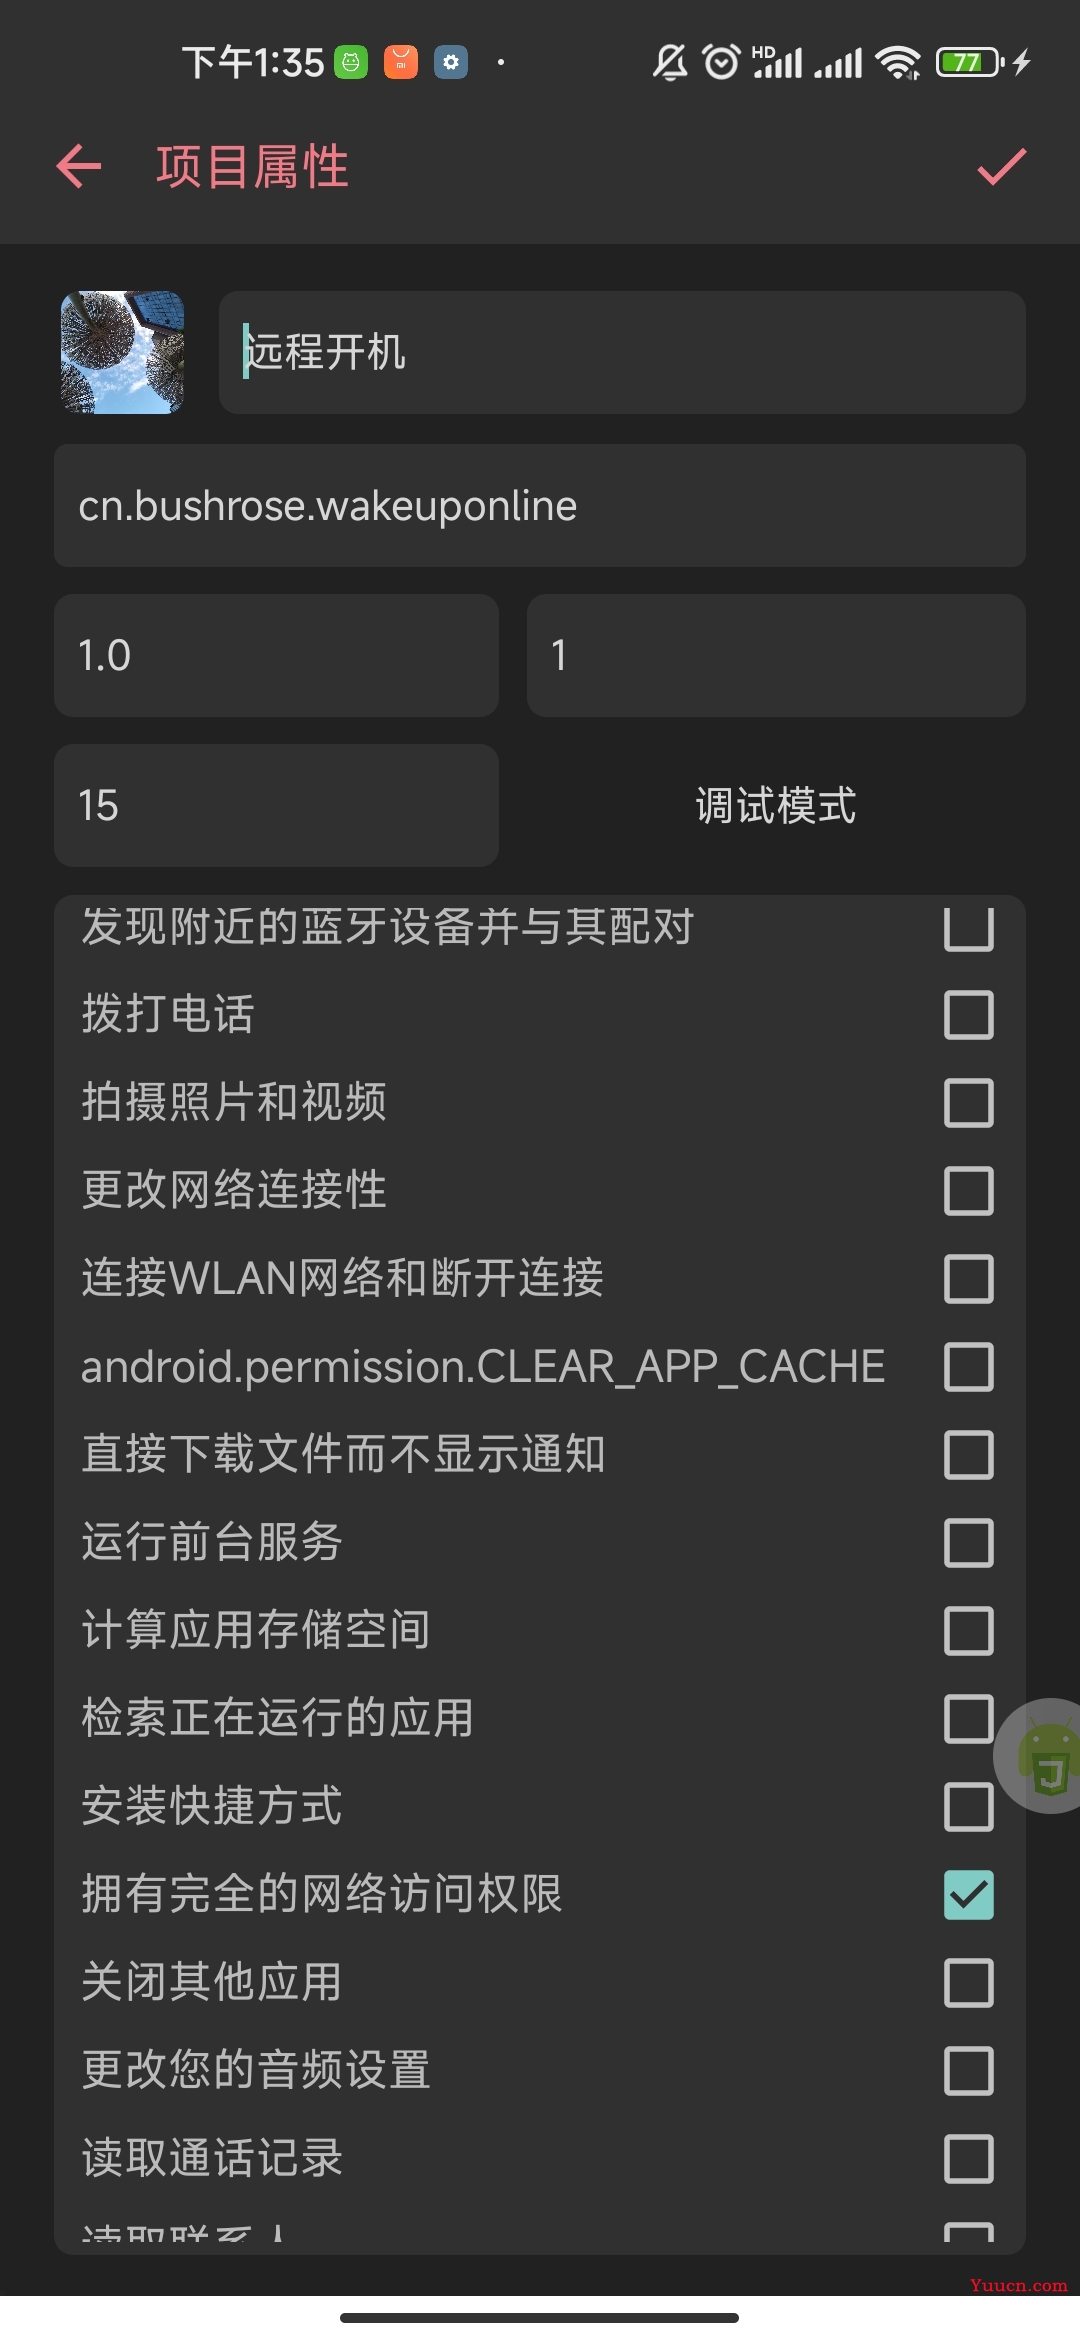
- 点击属性,设置项目属性。
取消选中调试模式,app需要的权限我们只选择拥有完全的网络访问权限即可,设置完成后点击右上角的勾保存。
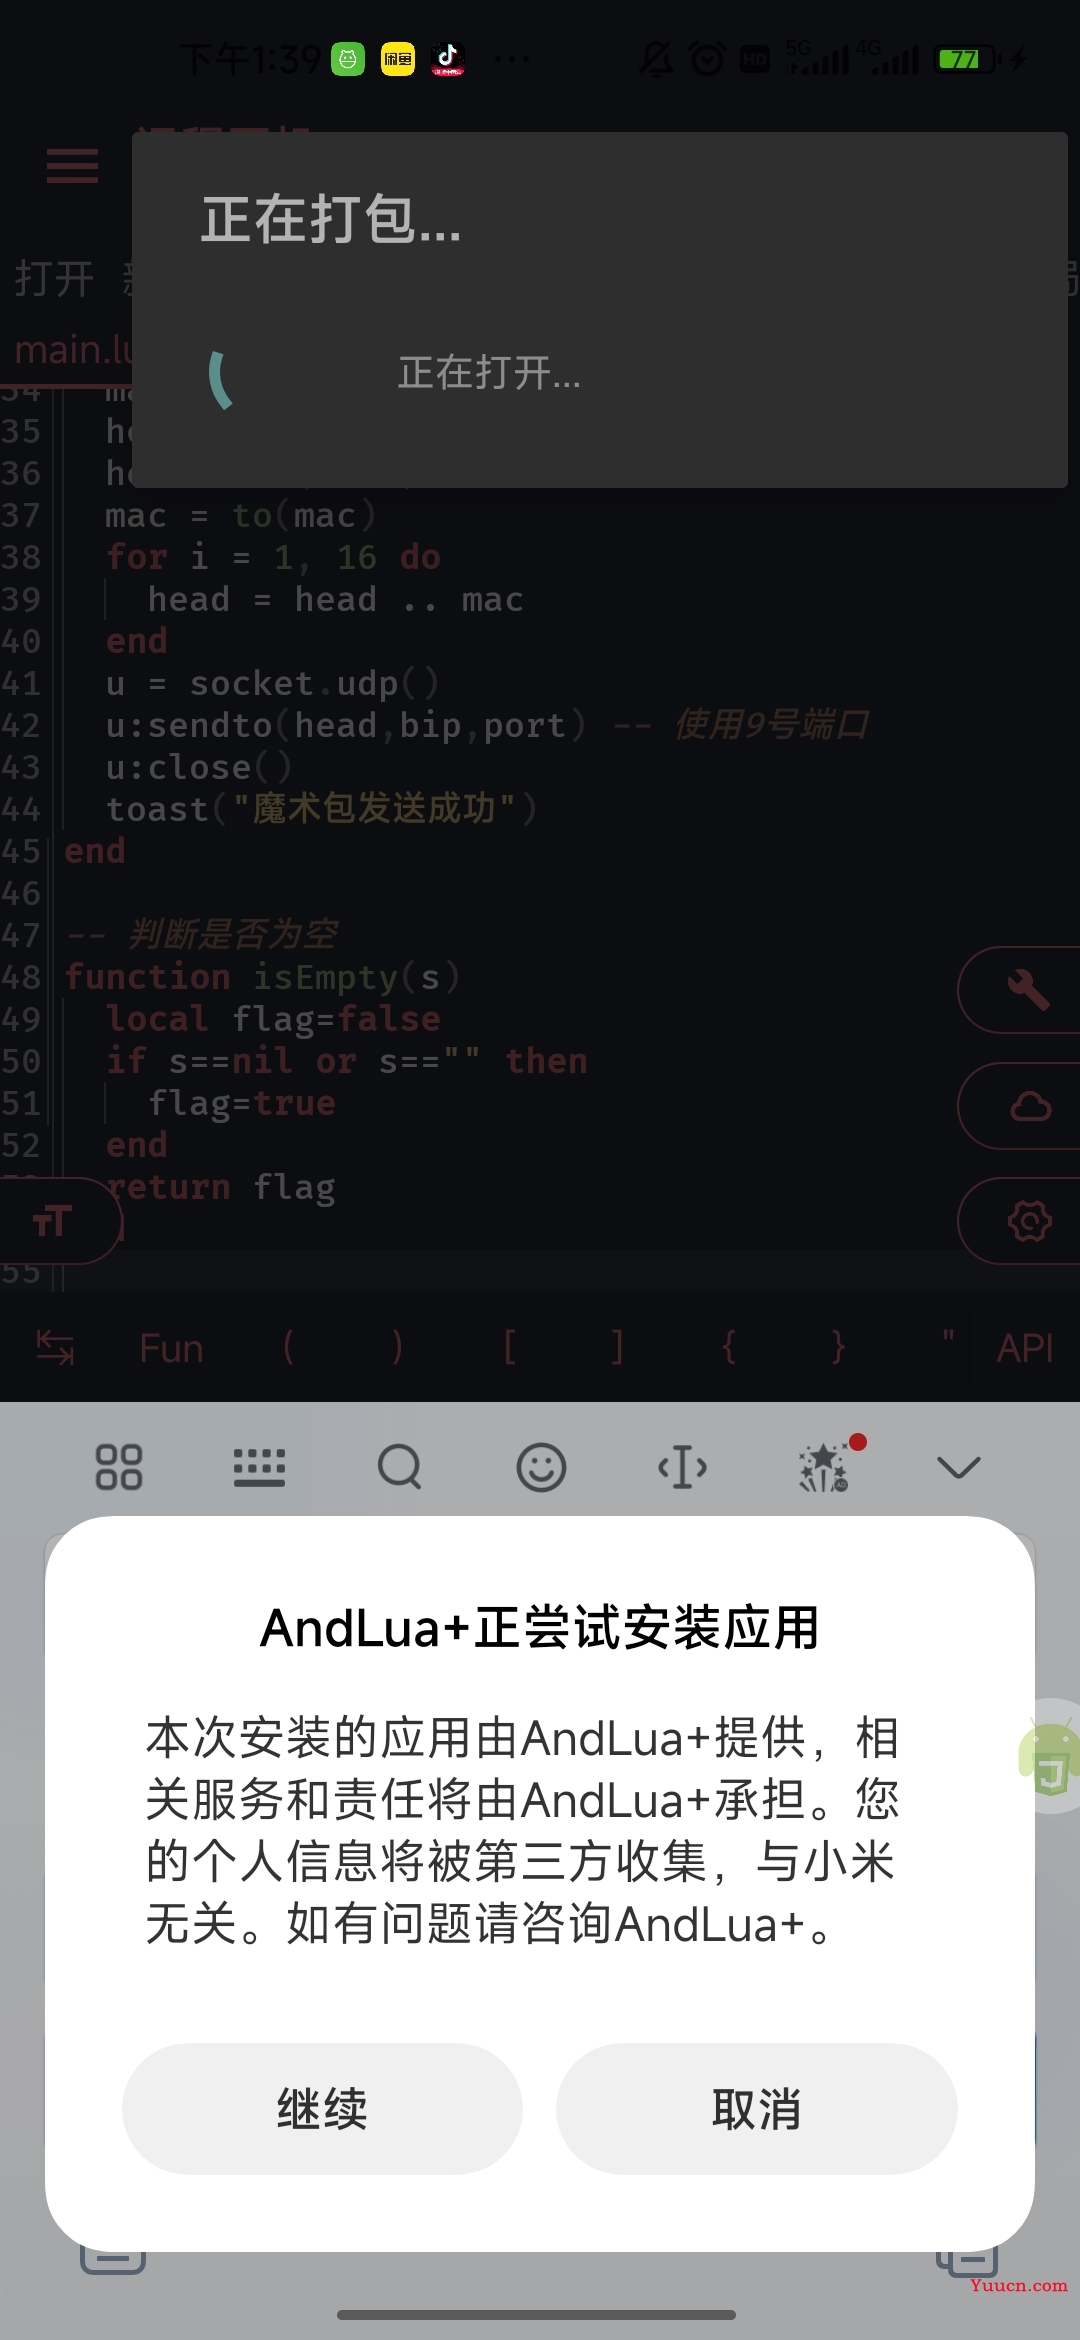
- 点击打包,打包完成后会提示安装,点击安装即可。
三、总结
andlua+软件提供了丰富的功能,让我们在手机上可以编程快速生成我们自己的应用,更多复杂的应用需要大家自行探索。
本文由【产品经理不是经理】gzh同步发布,欢迎关注