目录
前言:
一、新建 Vue3 项目
二、下载相关依赖
2.1 后台服务
2.2 前端连接
2.3 启动项目
2.4 触发与接收事件
2.5 原因分析
三、vue3 使用socket的原理
3.1 socket对象实例
3.2 socket 触发事件
3.3 socket对象监听原生事件
3.4 vue-socket.io 源码解析
3.5 使用emitter.addListner() 监听事件***
四、基于源码的 sockets 封装
4.1 addListner()
4.2 removeListener()
4.3 main.js 处理
4.4 实现监听事件
五、总结
5.1 所有代码如下
前言:
技术讨论群【522121825】
根据小伙伴的留言,很多人希望能出一个 Vue3 的socket连接,也有小伙伴对 room 的有兴趣,毕竟群聊的实现使用 room 更合理些,而不是广播。今天,记录一下 vue3 版本的Socket连接。
一、新建 Vue3 项目

二、下载相关依赖
npm i element-plus vue-socket.io --s
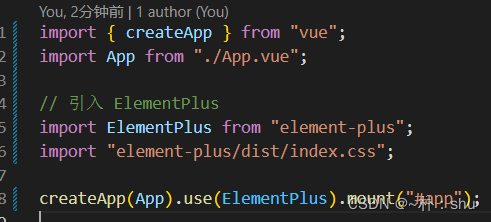
ElementPlus 引入注册使用(与平常一样),但是,socket.io 有些差异,还是按照旧模式引入,有问题我们再思考原因:
2.1 后台服务
如【连接篇】中的node服务,可得到如下简介代码:
var app = require("express")();
var http = require("http").Server(app);
var io = require("socket.io")(http, {
  allowEIO3: true,
  cors: {
    origin: "http://localhost:8080",
    methods: ["GET", "POST"],
    credentials: true,
  },
});
http.listen(3000, function () {
  console.log("listening on *:3000");
});
io.on("connection", function (socket) {
  console.log("a user connected");
});
2.2 前端连接
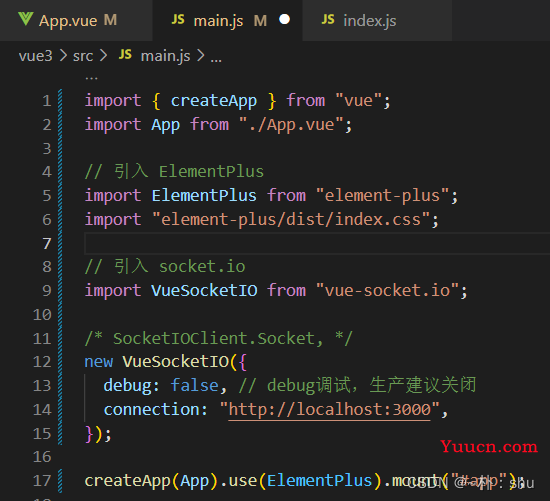
2.3 启动项目

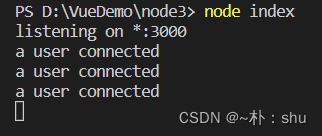
看出,现在项目能正常通信了,现在试试触发与接收事件:
2.4 触发与接收事件
io.on("connection", function (socket) {
  console.log("a user connected");
  socket.emit("welcome", "welcome connect socket Serve.");
  socket.on("send", (data) => {
    console.log("客户端发送消息:", data);
  });
});
按照之前的思路,触发事件,this.$socket.emit('xxx'),
接收事件使用 sockets:{
welcome(data){ xxxx}
},
但是!
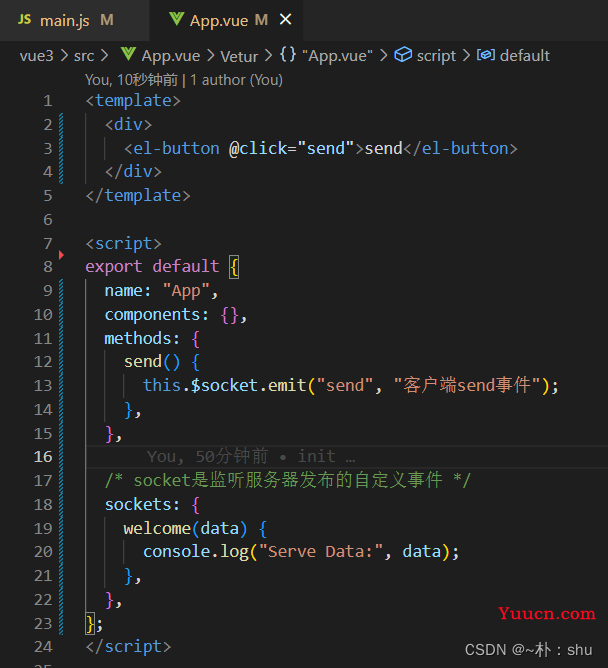
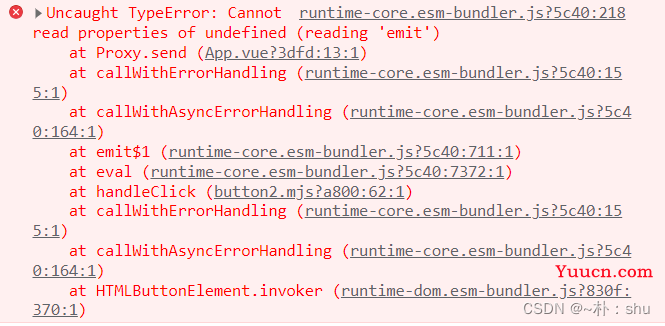
在 App.vue 中监听事件,并没有收到数据,并且触发事件还报错了!
2.5 原因分析
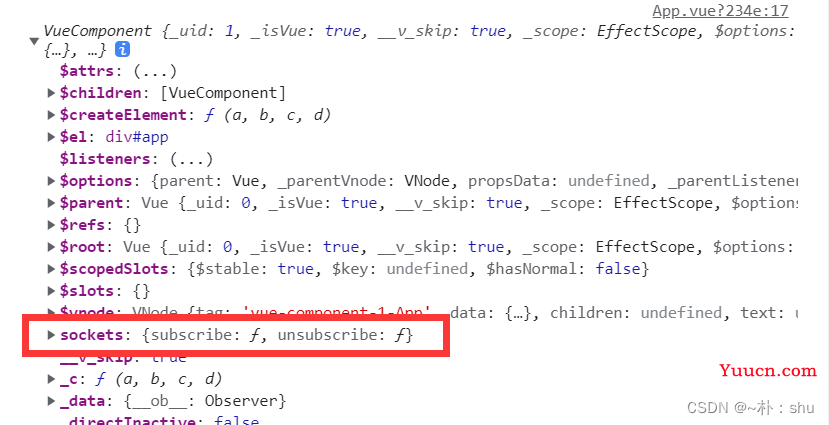
究其根源,我们应该清楚认识到,vue2与vue3 的区别。我们应该都听说过一句话,vue3 的实例对象更‘轻’了。这也导致了vue3 的this,不能‘装下’ $socket ,我们将 this 输出如下:
vue2 输出 this:
vue2 输出 this.$socket 【这个需要重点关注一下,vue3 的触发事件基于这个!!】
Vue3 输出this:
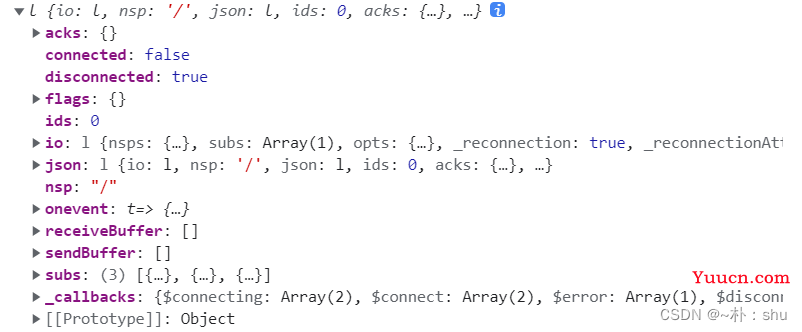
vue3 输出this.$socket:
这样是不是清晰看出,为什么不能使用 this.$socket触发事件与 sockets接收事件了吧。
三、vue3 使用socket的原理
3.1 socket对象实例
我们之前都不关注socket本身,只是利用其进行通信,现在看看socket自身:
/* SocketIOClient.Socket, */
const socket = new VueSocketIO({
  debug: false, // debug调试,生产建议关闭
  connection: "http://localhost:3000",
});
console.log(socket);
输出socket:

有小伙伴应该看到了,这个实例对象,其实就是 vue2 中的 this.$socket!故而,vue2只不过是将socket实例放在vue实例上,实际处理逻辑的,还是socket实例自身,因此,我们可以使用socket对象来触发和监听事件了。
3.2 socket 触发事件
根据刚才打印的 vue2 中的this.$socket,与vue3中的 socket.io是一样的,故而,(vue2:this.$socket.emit())= (vue3: socket.io.emit('eventName',someData)) 触发事件:
socket.io.emit("send", "测试 socket.io.emit事件");
3.3 socket对象监听原生事件
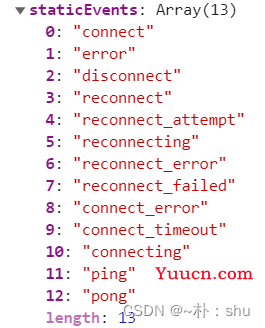
理论上,socket.io.emit触发方法,应该使用 socket.io.on()监听事件,但事实不行。socket.io.on是有特殊用处的,用于监听原生的默认事件:
// socket.io.on 不能用于监听 node 自定义事件
socket.io.on("welcome", (data) => {
  console.log("welcome",data); // 监听自定义事件
});
// 但是可以监听 默认事件
socket.io.on("connect", () => {
  console.log("connect"); // 监听 socket 连接事件
});
默认事件有:
3.4 vue-socket.io 源码解析
因为不能直接使用 socket.io.on() 监听事件,我们就需要看看vue2 中是如何实现的,为啥会有 sockets:{},就能监听到事件。根据 vue2 中的 sockets:{subscribe} , 在源码中直接搜索 sockets.subscribe,将相关联的函数抽出,得到如下代码:
var n = {
  beforeCreate() {
    this.sockets || (this.sockets = {}),
      (this.sockets.subscribe = (t, e) => {
        this.$vueSocketIo.emitter.addListener(t, e, this);
      }),
      (this.sockets.unsubscribe = (t) => {
        this.$vueSocketIo.emitter.removeListener(t, this);
      });
  },
  mounted() {
    this.$options.sockets &&
      Object.keys(this.$options.sockets).forEach((t) => {
        "subscribe" !== t &&
          "unsubscribe" !== t &&
          this.$vueSocketIo.emitter.addListener(
            t,
            this.$options.sockets[t],
            this
          );
      });
  },
  beforeDestroy() {
    this.$options.sockets &&
      Object.keys(this.$options.sockets).forEach((t) => {
        this.$vueSocketIo.emitter.removeListener(t, this);
      });
  },
};
以上代码不解读了,不懂的伙伴可以留言讨论哈。
为啥vue原来没有sockets属性,直接加sockets就能监听事件,原理是使用了$options将sockets中的事件,通过this.$vueSocketIo.emitter.addListener()添加到 socket对象上。
this.$vueSocketIo.emitter.addListener(
t,
this.$options.sockets[t],
this
);
模拟this.$vueSocketIo.emitter.addListener()的形式实现事件监听:
3.5 使用emitter.addListner() 监听事件***
/* SocketIOClient.Socket, */
const socket = new VueSocketIO({
  debug: false, // debug调试,生产建议关闭
  connection: "http://localhost:3000",
});
socket.emitter.addListener("welcome", (data) => {
  console.log("addListener", data);
});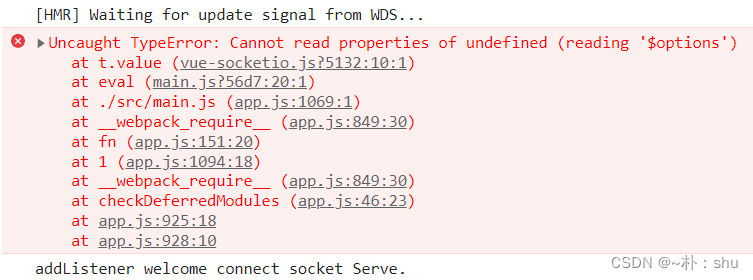
胜利的曙光!!!
但是还是报错了,源码还是使用了 this.$options 的形式处理,故而需要处理一下:
【也看了很多博主的方案,说需要修改源码,毕竟我们也找到了源码所在的位置,但是不建议大家这么做,我们只需要基于源码再封装处理一下,就能满足我们的使用了】
四、基于源码的 sockets 封装
4.1 addListner()
源码中无非就是 this.$options 和this我们获取不到,那我们再封装一下,如下(新建 sockets.js):
export const registerSockets = (sockets, proxy) => {
  sockets &&
    Object.keys(sockets).forEach((t) => {
      "subscribe" !== t &&
        "unsubscribe" !== t &&
        proxy.$socket.emitter.addListener(t, sockets[t], proxy);
    });
};
4.2 removeListener()
export const destroySockets = (sockets, proxy) => {
  sockets &&
    Object.keys(sockets).forEach((t) => {
      proxy.$socket.emitter.removeListener(t, proxy);
    });
};
基于源码的 sockets 方法处理。
4.3 main.js 处理
import { createApp } from "vue";
import App from "./App.vue";
// 引入 ElementPlus
import ElementPlus from "element-plus";
import "element-plus/dist/index.css";
import { registerSockets, destroySockets } from "./sockets";
// 引入 socket.io
import VueSocketIO from "vue-socket.io";
const app = createApp(App);
/* SocketIOClient.Socket, */
const socket = new VueSocketIO({
  debug: false, // debug调试,生产建议关闭
  connection: "http://localhost:3000",
});
// 便于在任意位置获取到 socket 对象
app.config.globalProperties.$socket = socket;
// 监听事件
app.config.globalProperties.$addSockets = registerSockets;
// 移除事件
app.config.globalProperties.$removeSockets = destroySockets;
app.use(ElementPlus).mount("#app");
4.4 实现监听事件
在需要监听的页面使用:
import { getCurrentInstance, onMounted, onBeforeUnmount } from "vue";
 setup() {
    // 获取 当前实例对象
    const { proxy } = getCurrentInstance();
    // 触发事件
    proxy.$socket.io.emit("send", "client send some data to node Serve.");
    // 定义监听node事件
    const sockets = {
      welcome(data) {
        console.log(data);
      },
    };
    // 注册 node 事件
    onMounted(() => {
      proxy.$sockets(sockets, proxy);
    });
    // 注销 node 事件
    onBeforeUnmount(() => {
      proxy.$removeSockets(sockets, proxy);
    });
  },
能正常接收信息,也能发送消息:


五、总结
总的来看,要深入了解socket的源码,知道其实现方式,基于源码,将vue3的特性结合进去。现在的事件触发与接收,均使用 proxy 实现。
当然,也可以在app中,直接获取子组件的所有 setup 中的sockes,进行统一注册,有更简洁的方式实现,但是原理就是使用vue3 的proxy。
5.1 所有代码如下:
main.js
import { createApp } from "vue";
import App from "./App.vue";
// 引入 ElementPlus
import ElementPlus from "element-plus";
import "element-plus/dist/index.css";
import { registerSockets, destroySockets } from "./sockets";
// 引入 socket.io
import VueSocketIO from "vue-socket.io";
const app = createApp(App);
/* SocketIOClient.Socket, */
const socket = new VueSocketIO({
  debug: false, // debug调试,生产建议关闭
  connection: "http://localhost:3000",
});
// 便于在任意位置获取到 socket 对象
app.config.globalProperties.$socket = socket;
// 监听事件
app.config.globalProperties.$addSockets = registerSockets;
// 移除事件
app.config.globalProperties.$removeSockets = destroySockets;
app.use(ElementPlus).mount("#app");
sockets.js
export const registerSockets = (sockets, proxy) => {
  sockets &&
    Object.keys(sockets).forEach((t) => {
      "subscribe" !== t &&
        "unsubscribe" !== t &&
        proxy.$socket.emitter.addListener(t, sockets[t], proxy);
    });
};
export const destroySockets = (sockets, proxy) => {
  sockets &&
    Object.keys(sockets).forEach((t) => {
      proxy.$socket.emitter.removeListener(t, proxy);
    });
};
App.vue
<template>
  <div> app </div>
</template>
<script>
import { getCurrentInstance, onMounted, onBeforeUnmount } from "vue";
export default {
  components: { HelloWorldVue },
  setup() {
    const { proxy } = getCurrentInstance();
    const sockets = {
      welcome(data) {
        console.log(data);
      },
    };
    proxy.$socket.io.emit("send", "client send some data to node Serve.");
    onMounted(() => {
      proxy.$addSockets(sockets, proxy);
    });
    onBeforeUnmount(() => {
      proxy.$removeSockets(sockets, proxy);
    });
    return {};
  },
};
</script>
优化方案可以自己研究一下,基于 vue3 的socket rooms demo 下期更新。
