动态路由,也就是不是写死的路由,根据自己的需求加载不同的页面;现在很多的后台管理项目就是根据用户角色的不同分配不同的功能菜单(页面);
根据用户登录的角色返回可以访问的页面路由,前端将路由存储到 pinia 实现持久话存储,然后在路由前置守卫用 addRoute 动态添加路由,对页面进行渲染。
通常的实现步骤:
- 前端调用登录接口获取用户ID(uid)
- 前端用uid请求接口获取路由表(JSON)
- 对路由表进行数据格式话形成树形结构
- 树形结构 转 vue路由结构
- 路由结构 转 静态路由
- 树形结构 转 菜单组件
下面是我练习一个demo,仅用于学习与记录;
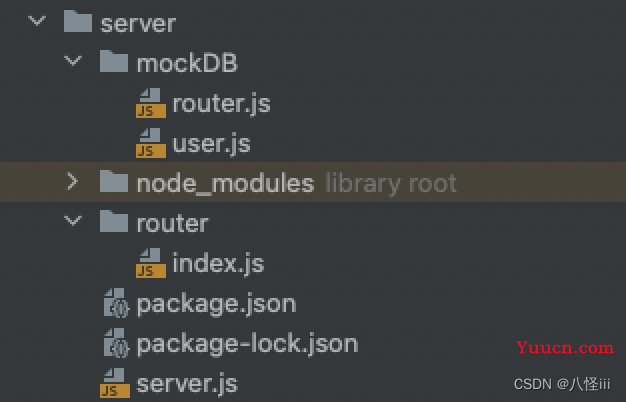
服务端代码结构:
服务端在本地localhost:3007,

server.js
//导入express 模块
const express = require("express")
//创建 express 实例
const app = express()
//导入cors 中间件
const cors = require("cors")
app.use(cors())
//配置表单解析中间件
app.use(express.urlencoded({extended:false}))
const useRouter = require("./router/index.js")
app.use("/api",useRouter)
app.listen(3007,function (){
    console.log("api server running at http://127.0.0.1:3007")
})
router/index.js
const express = require("express")
const router = express.Router()
const users = require("../mockDB/user.js")
const routers = require("../mockDB/router.js")
router.post("/routers", (req, res) => {
    const {uid} = req.body
    if (uid) {
        let authRouterInfo;
        authRouterInfo = [];
        const userInfo = users.find(user => user.id === JSON.parse(uid))
        console.log(users)
        userInfo.auth.map((rid) => {
                routers.map((router) => {
                    if (router.id === rid) {
                        authRouterInfo.push(router)
                    }
                })
        })
        res.send({
            status: 0,
            msg: "post 请求成功",
            data: authRouterInfo
        })
    } else {
        res.send(
            {
                status: 0,
                msg: "查询不到此uid !",
                data: null
            }
        )
        }
    }
)
    module.exports = router
mockDB/user.js
module.exports = [
    {
        id:1,
        name:"zhangsan",
        auth:[2,3,6,7]
    },
    {
        id:2,
        name:"lisi",
        auth:[2,3,5,6,7,8]
    },
    {
        id:3,
        name:"wangwu",
        auth:[2,3,4,5,6,7,8]
    },
    {
        id:4,
        name:"mazi",
        auth:[6,7,8]
    }
]
mockDB/router.js
module.exports = [
    {
        id:2,
        pid:0,
        path:"/course",
        name:"Course",
        title:"课程管理"
    },
    {
        id:3,
        pid:2,
        path:"operate",
        name:"CourseOperate",
        title:"课程操作",
        link:"/course/operate"
    },
    {
        id:4,
        pid:3,
        path:"info_data",
        name:"CourseInfoData",
        title:"课程数据",
        link:"/course/operate/info_data"
    },
    {
        id:5,
        pid:2,
        path:"add",
        name:"CourseAdd",
        title:"课程添加",
        link:"/course/add"
    },
    {
        id:6,
        pid:0,
        path:"/student",
        name:"Student",
        title:"学生管理"
    },
    {
        id:7,
        pid:6,
        path:"operate",
        name:"StudentOperate",
        title:"学生操作",
        link:"/student/operate"
    },
    {
        id:7,
        pid:6,
        path:"add",
        name:"StudentAdd",
        title:"学生增加",
        link:"/student/add"
    }
]
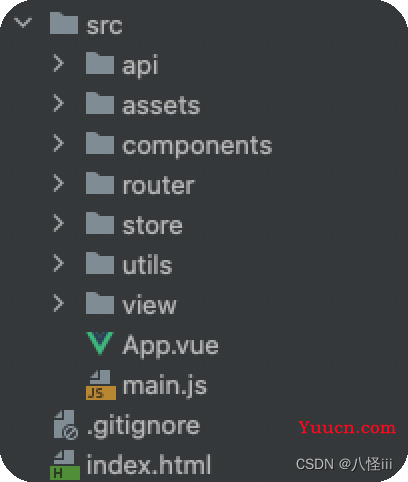
前端代码结构:
前端调用 /api/routers 传入 uid 获取用户路由表

调用接口
import axios from "axios"
import qs from "qs"
export function getRouters(uid){
    return  axios({
        url:"http://127.0.0.1:3007/api/routers",
        method:"post",
        header:{
            "Content-type":"application/x-www-from-urlencoded"
        },
        data:qs.stringify({uid})
    })
}
将路由表格式成树结构, 路由表结构mockDB/router.js
export function formatRouterTree(datas) {
    let res = []
    datas.map(data => {
        // data.children = []
        //console.log(data.children)
        if (data.pid === 0) {
            res.push(data)
        } else {
            add2Tree(data, res)
        }
    })
    return res
}
function add2Tree(data, res) {
    res.map(r => {
        if (data.pid === r.id) {
            if (!r.children) r.children = []
            r.children.push(data)
        } else {
            if (r.children)
                add2Tree(data, r.children)
        }
    })
}
树结构 转 vue路由结构
export function generateRouter(userRouters) {
    let newRouters;
    newRouters = userRouters.map(r => {
        let routes = {
            path: r.path,
            name: r.name,
            component: () => import(`../view/${r.name}.vue`)
        }
        if (r.children) {
            routes.children = generateRouter(r.children)
        }
        return routes
    });
    return newRouters
}
先配置静态的路由,接着添加动态路由 ==> router/route.js
const routes = [
    {
        path:"/",
        name:"Home",
        component:() => import ("../view/Home.vue")
    },
    // {
    //     path:"/404",
    //     name:"NotFound",
    //     component:() => import ("../view/NotFound.vue")
    // },
    // {
    //     path:"/:pathMatch(.*)",
    //     redirect:"/404"
    // }
]
export default routes;
router.beforeEach(async (to, from, next) => {
const store = useRouterStore()
if (!store.hasAuth) {
await store.getRoutersList()
let newRoutes = generateRouter(store.userRouters)
let a = [...newRoutes,
{
path: "/404",
name: "NotFound",
component: () => import ("../view/NotFound.vue")
},
{
path: "/:pathMatch(.*)",
redirect: "/404"
}]
a.forEach((r) => {
router.addRoute(r)
})
next({...to, replace: true})
console.log(a)
}else {
if(to.name === null){
next("/404")
}
next()
}
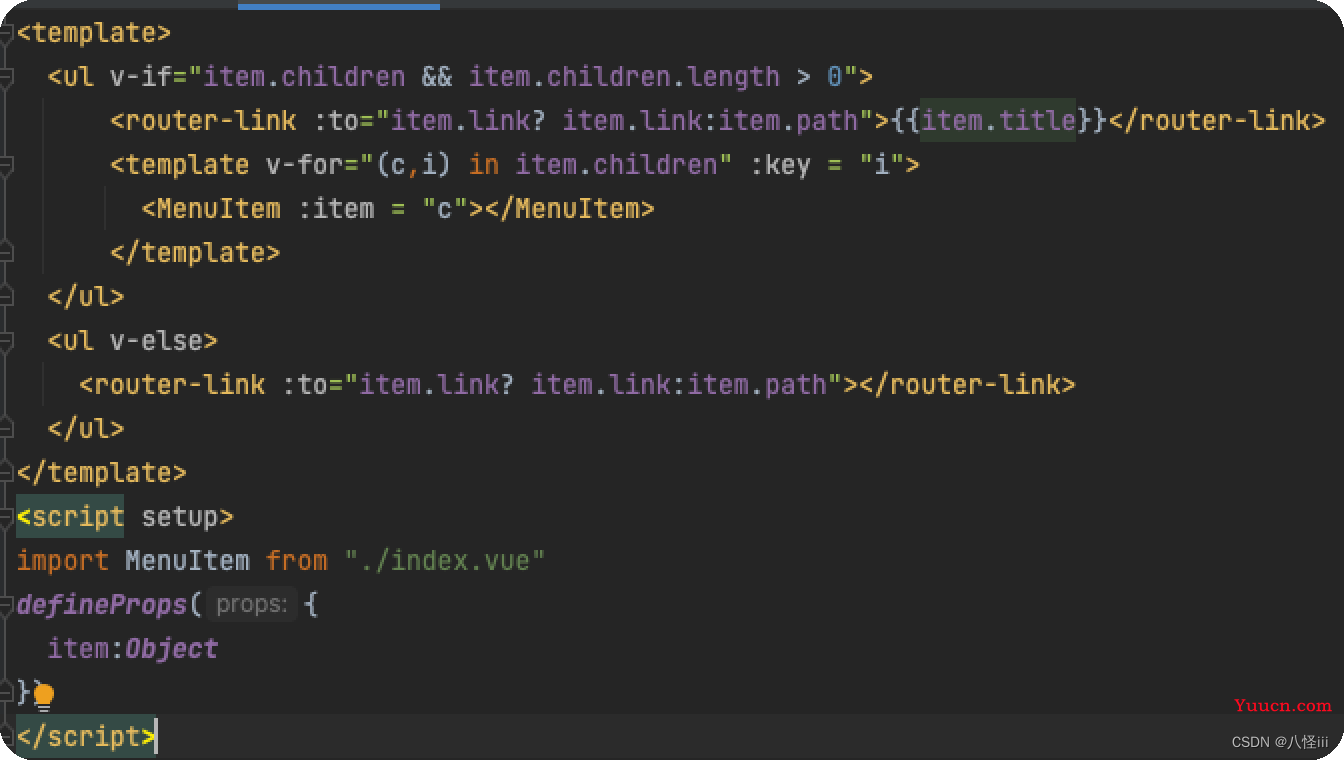
})递归组件模版渲染菜单组件
