欢迎使用Markdown编辑器
提示:文章写完后,目录可以自动生成,如何生成可参考右边的帮助文档
文章目录
- 欢迎使用Markdown编辑器
- 一、浮动布局 (float布局)
- 二、position 定位布局
-
- 1. 相对定位
- 2.绝对定位 absolute
- 三 、flex 弹性布局
一、浮动布局 (float布局)
使用浮动来完成左中右三栏布局
float:left----左浮动
float:right----右浮动
注意:使用float浮动时,margin:0px auto;使块元素居中将会失效。
代码示例
<!DOCTYPE html>
<html>
	<head>
		<meta charset="utf-8">
		<title></title>
		<style type="text/css">
			#box{
				width: 700px;
				background-color: skyblue;
			}
			#box>div{
				width: 200px;
				height: 200px;
				line-height: 200px;
				text-align: center;
			}
			.left{
				background-color: orange;
				float: left;
			}
			.right{
				background-color: deeppink;
				float: right;
			}
			.center{
				background-color: yellow;
				margin: 0px auto;
			}
		</style>
	</head>
	<body>
		<div id="box">
			<div class="left">div1</div>
			<div class="right">div2</div>
			<div class="center">div3</div>
		</div>
	</body>
</html>

当我们给div3也加上一个浮动属性时
.center{
	background-color: yellow;
	margin: 0px auto;
	float:right
}

这时我们可以看到,整个盒子box的天蓝色背景色会消失,这是为什么呢?
注意:float浮动属性会使元素脱离文档流。所以当我们把一个父级元素下的子元素全部设置float浮动属性时,如果父级元素没有设置固定高度,则会造成父级元素塌陷。
清除浮动的三种方式。
1、 clear:both; 清楚两边浮动
.center{
	background-color: yellow;
	margin: 0px auto;
	float:right;
	clear:both;
2、 overflow:hidden; 溢出隐藏。
3、 在尾部添加一个div
<div id="box">
	<div class="left">div1</div>
	<div class="right">div2</div>
	<div class="center">div3</div>
	<div></div>
</div>
二、position 定位布局
注意:给元素设置了定位属性,也会使这个元素脱离文档流。
定位有四个属性,分别是 top 上 bottom下 left 左 right 右。
1. 相对定位
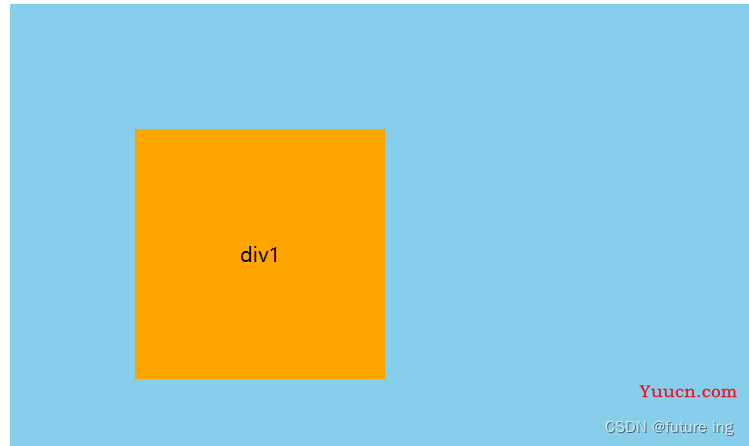
position:relative; 相对定位是根据自身在页面中的位置来进行上下左右移动定位的。
<!DOCTYPE html>
<html>
	<head>
		<meta charset="utf-8">
		<title></title>
		<style type="text/css">
			#box{
				width: 600px;
				height: 600px;
				background-color: skyblue;
			}
			.div1{
				width: 200px;
				height: 200px;
				line-height: 200px;
				text-align: center;
				background-color: orange;
			}
		</style>
	</head>
	<body>
		<div id="box">
			<div class="div1">div1</div>
		</div>
	</body>
</html>
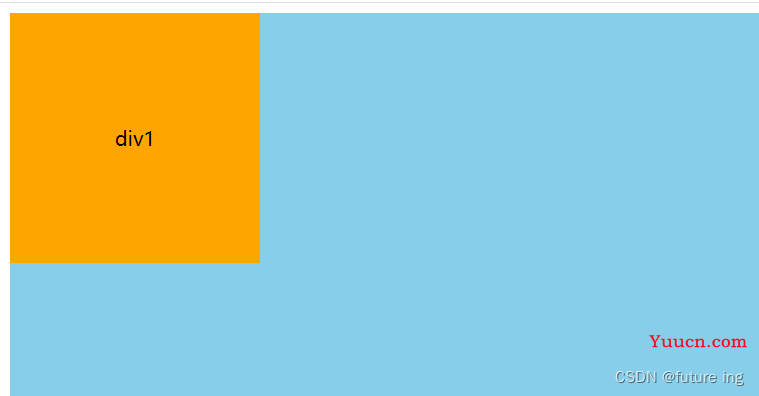
设置了相对定位后,div1就会根据自身现在所在的位置移动
.div1{
	width: 200px;
	height: 200px;
	line-height: 200px;
	text-align: center;
	background-color: orange;
	position:relative;
	top:100px;
	left:100px;
}
2.绝对定位 absolute
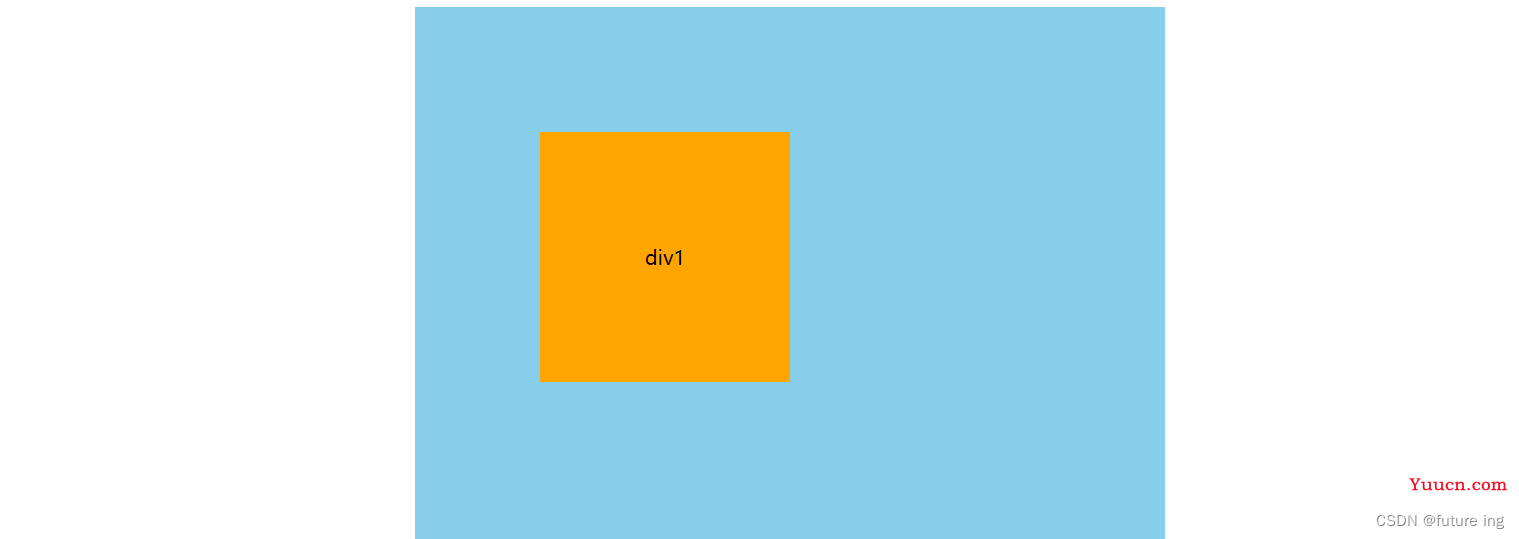
关于绝对定位有个通用的说法 “子绝父相”。即给元素设置了绝对定位,就要在父级元素上设置一个相对定位,如果父级元素上找不到相对定位,那这个元素就会根据浏览器窗口的位置来进行定位。
父级元素不设置相对定位,代码和效果如下
<!DOCTYPE html>
<html>
	<head>
		<meta charset="utf-8">
		<title></title>
		<style type="text/css">
			#box{
				width: 600px;
				height: 600px;
				background-color: skyblue;
				margin: 0 auto;
			}
			.div1{
				width: 200px;
				height: 200px;
				line-height: 200px;
				text-align: center;
				background-color: orange;
				position:absolute;
				top:100px;
				left:100px;
			}
		</style>
	</head>
	<body>
		<div id="box">
			<div class="div1">div1</div>
		</div>
	</body>
</html>
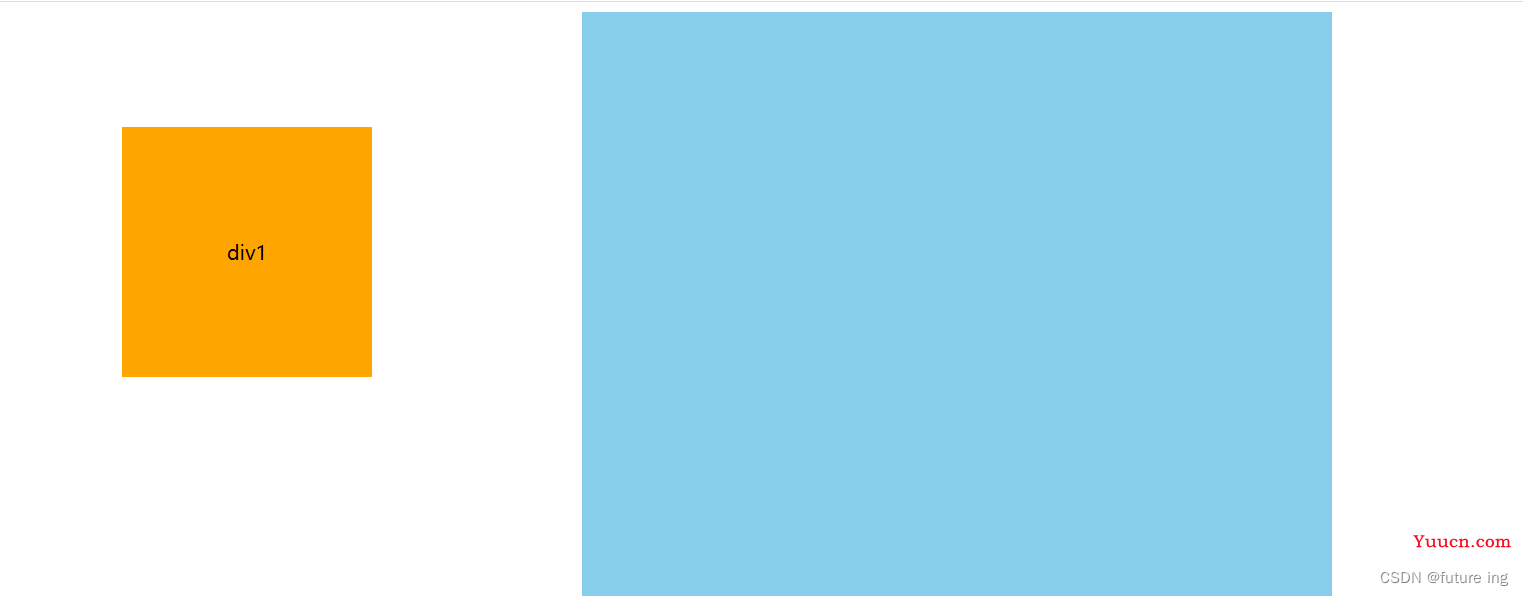
我们再给父级元素一个相对定位,则div1就会根据这个父级盒子来进行定位
#box{
	width: 600px;
	height: 600px;
	background-color: skyblue;
	margin: 0 auto;
	position: relative;
}
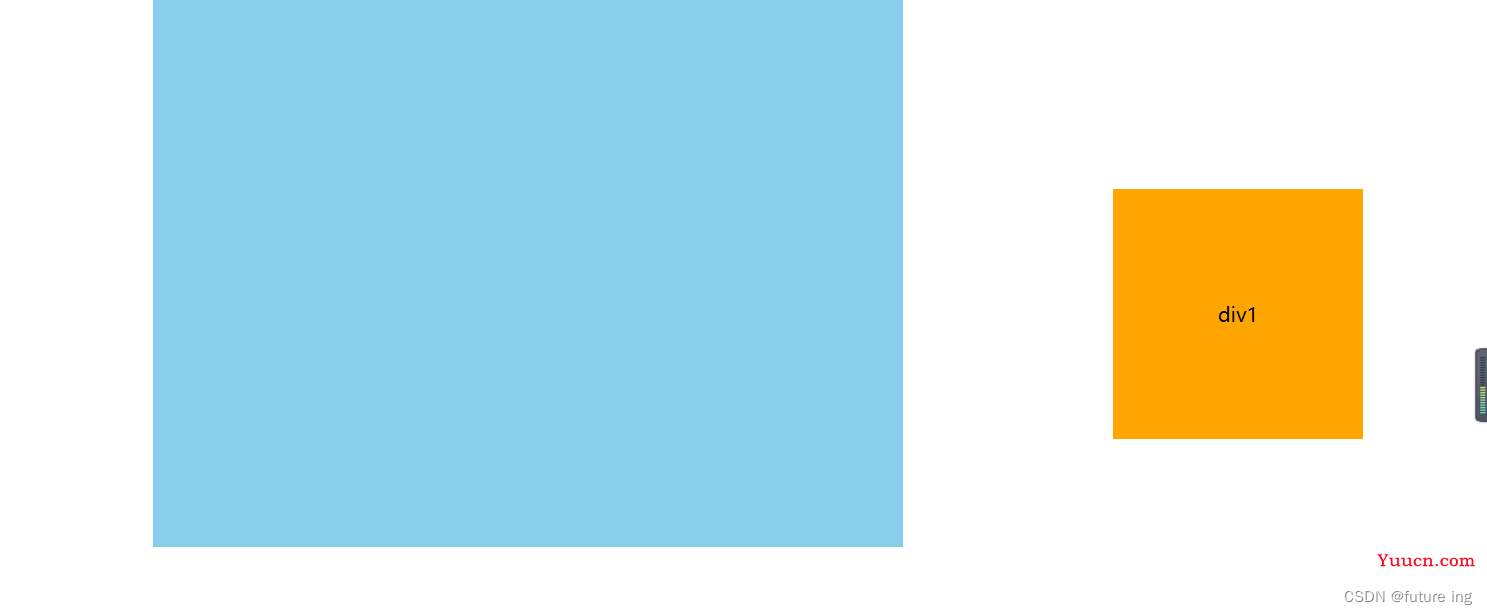
3. 固定定位 fixed
fixed 固定定位就比较好理解了,顾名思义,固定定位就是将一个元素固定在页面当中的某一个位置上,不管页面滚动条如何移动,这个元素的位置都不会改变。
固定定位是根据浏览器可视窗口来进行固定的。就相当于页面当中出现的小广告位置一样。
.div1{
	width: 200px;
	height: 200px;
	line-height: 200px;
	text-align: center;
	background-color: orange;
	position:fixed;
	bottom: 200px;
	right: 100px;
}
4. z-index属性
定位元素还有一个z-index属性,因为我们的定位元素已经脱离了文档流,那么当有多个元素在同一个位置时,就需要用z-index属性来设置堆叠的层次了。z-index属性,谁的值大谁就在最上面。
.orange{
	background-color: orange;
	z-index: 1;
	position: absolute;
	left: 100px;
}
.yellow{
	background-color:yellow;
	z-index: 2;
	position: absolute;
	top: 100px;
	left: 150px;
}
.skyblue{
	background-color: skyblue;
	z-index: 3;
	position: absolute;
	top: 200px;
	left: 200px;
}
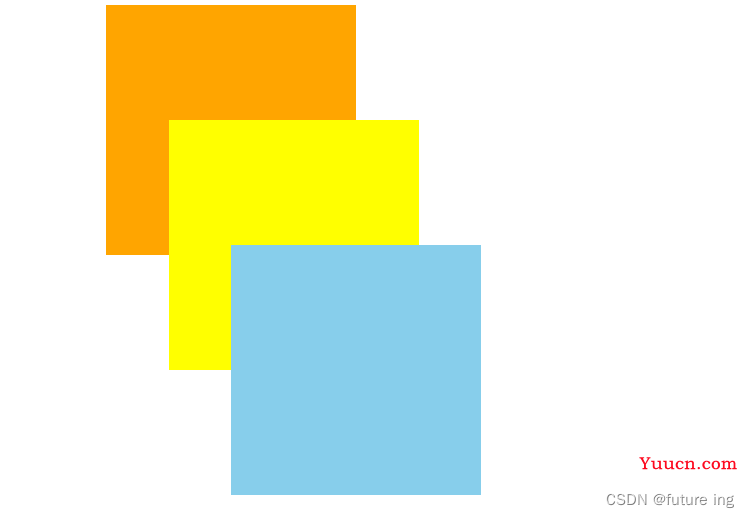
注意:未使用定位属性的元素设置z-index是无效的哦。
三 、flex 弹性布局
弹性布局:在父级元素设置display:fkex;弹性布局属性,可以使子元素弹性伸缩。
注意:设为 Flex 布局以后,子元素的float、clear和vertical-align属性将失效。
任何一个被设置为弹性布局的容器会有两条抽象的轴(X,Y轴),弹性布局的容器的有以下属性
-
flex-direction 决定项目主轴(X轴)的排列方向
row 主轴方向从左到右排列,主轴为横向轴
row-reverse 主轴方向从右到左排列
column 主轴为纵向纵
column-reverse 交叉轴上从下往上排列
flex-wrap 所有项目如何被包裹
nowarp 不换行(列),项目的宽高会变化
wrap 换行(列),溢出会顺序换行
wrap-reverse 反向排列
flex-flow 属性是flex-direction属性和flex-wrap属性的简写形式,默认值为row nowrap
justify-content 属性定义了项目在主轴(X轴)上的对齐方式。
flex-start(默认值):左对齐
flex-end:右对齐
center: 居中
space-between:两端对齐,项目之间的间隔都相等。
space-around:每个项目两侧的间隔相等。所以,项目之间的间隔比项目与边框的间隔大一倍。
align-items 属性定义项目在交叉轴(Y轴)上如何对齐
flex-start:交叉轴的起点对齐。
flex-end:交叉轴的终点对齐。
center:交叉轴的中点对齐。
baseline: 项目的第一行文字的基线对齐。
stretch(默认值):如果项目未设置高度或设为auto,将占满整个容器的高度。