目录
1 insightface简介
2 安装insightface
3 使用insightface
4 结合Flask框架
1 insightface简介
最近人脸识别等机器学习的项目很火,偶然间发现了一个开源的人脸识别的开源项目insightface。
人脸识别技术可以准确识别出图像中的人脸和身份,具有丰富的应用场景,譬如金融场景下的刷脸支付、安防场景下的罪犯识别和医学场景下的新冠流行病学调查等等。人脸识别的算法演变经历了以 PCA 为代表的早期阶段,再到以“人工特征+分类器”为主的统计学习方法阶段,近几年,随着大数据及 GPU 算力的爆发,人脸识别进入到深度学习算法为绝对主角的阶段。
InsightFace 是基于 MXNet 框架实现的业界主流人脸识别解决方案。相较MXNet的实现方案,基于OneFlow的实现方案在性能方面更是十分优秀,OneFlow在数据并行时速度是其2.82倍;模型并行时速度是其2.45倍;混合并行+Partial fc时速度是其1.38倍。基于OneFlow实现的代码已合并至 insightface的官方仓库,其中包含了数据集制作教程、训练和验证脚本、预训练模型以及和MXNet模型的转换工具。
2 安装insightface
安装insightface很简单,只要运行下面的代码即可:
pip3 install -U insightface安装过程中可能需要安装其他的依赖项,只要根据提示进行相应的安装就可以了。
3 使用insightface
安装好insightface后,可以新建一个test.py,加入下面的代码:
import cv2
import numpy as np
import insightface
from insightface.app import FaceAnalysis
from insightface.data import get_image as ins_get_image
app = FaceAnalysis(providers=['CUDAExecutionProvider', 'CPUExecutionProvider'])
app.prepare(ctx_id=0, det_size=(640, 640))
img = ins_get_image('t1')
faces = app.get(img)
rimg = app.draw_on(img, faces)
cv2.imwrite("./t1_output.jpg", rimg)
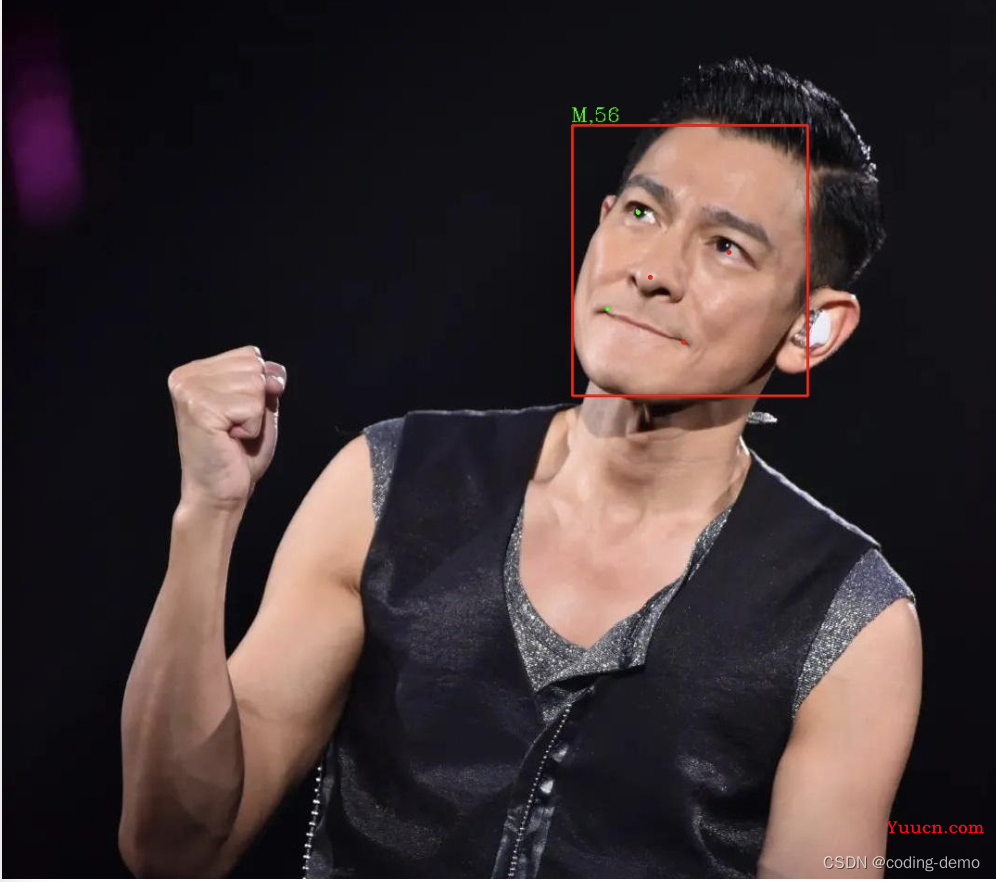
运行后会得到结果:

是不是很酷~~
4 结合Flask框架
新建server.py
import flask, os, sys, time
from flask import Flask, render_template, request, make_response
import func
app = Flask(__name__)
interface_path = os.path.dirname(__file__)
sys.path.insert(0, interface_path)
@app.route('/', methods=['get'])
def index():
    return render_template('index.html')
@app.route('/upload', methods=['post'])
def upload():
    fname = request.files['img']
    print("@@@@@@@@@@@@@@@@@@@@@@")
    print(fname.filename)
    newName = r'static/upload/' + fname.filename
    fname.save(newName)
    func.getRet(newName)
    #image_data = open("ldh_output.jpg", "rb").read()
    #response = make_response(image_data)
    #response.headers['Content-Type'] = 'image/jpg'
    #return response
    return render_template('result.html')
if __name__ == '__main__':
    app.run(host='0.0.0.0', port=5000, debug='True')
新建func.py
import cv2
import numpy as np
import insightface
from insightface.app import FaceAnalysis
from insightface.data import get_image as ins_get_image
app = FaceAnalysis(providers=['CUDAExecutionProvider', 'CPUExecutionProvider'])
app.prepare(ctx_id=0, det_size=(640, 640))
#img = ins_get_image('t1')
def getRet(filename):
    img = cv2.imdecode(np.fromfile(filename, dtype=np.uint8), -1)
    faces = app.get(img)
    rimg = app.draw_on(img, faces)
    cv2.imwrite("./static/ldh_output.jpg", rimg)
新建index.html
<!DOCTYPE html>
<html lang="en">
<head>
    <meta charset="UTF-8">
    <meta http-equiv="X-UA-Compatible" content="IE=edge">
    <meta name="viewport" content="width=device-width, initial-scale=1.0">
    <title>人脸识别</title>
</head>
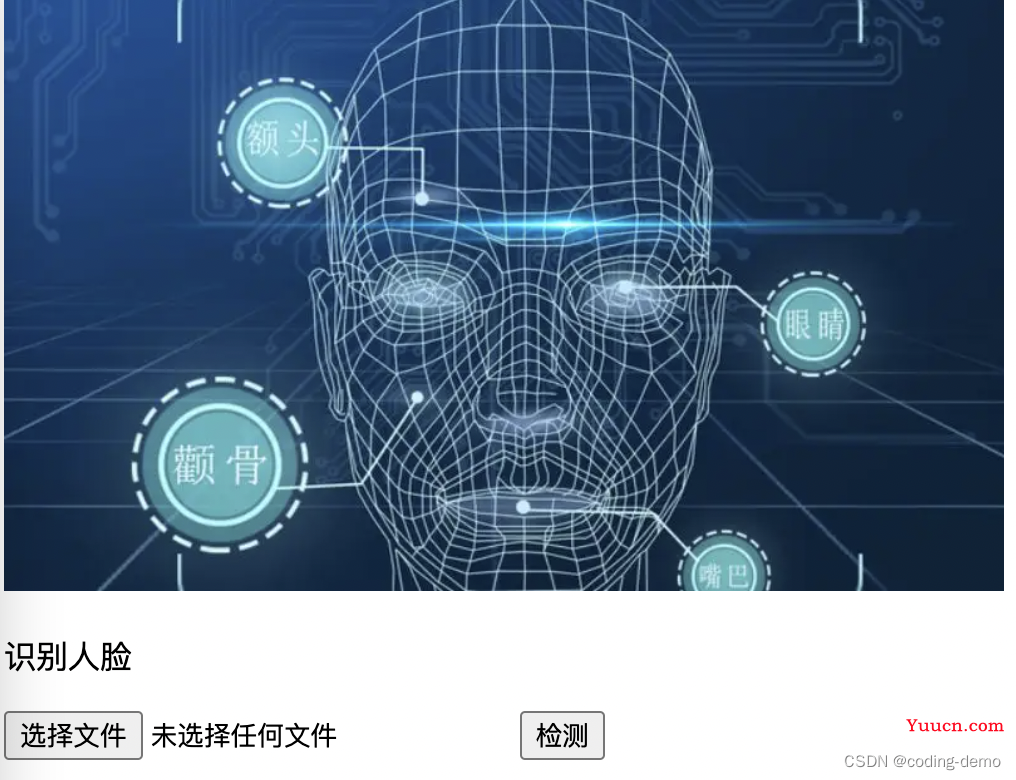
<img src="{{ url_for('static', filename='title.webp') }}" width="500" height=auto>
<form action="upload" method="post" enctype="multipart/form-data">
    <body class="light-theme">
        <p>识别人脸</p>
        <input type="file" id="img" name="img">
        <button type="submit">检测</button>
    </body>
</form>
</html>
新建result.html
<html>
    <body>
        <img src="{{ url_for('static', filename='ldh_output.jpg') }}" width="500" height=auto>
    </body>
</html>
新建main.css
:root {
    --green: #00FF00;
    --white: #FFFFFF;
    --black: #000000;
  }
body {
    background: var(--bg);
    color: var(--fontColor);
    font-family: helvetica;
}
.light-theme {
    --bg: var(--green);
    --fontColor: var(--black);
}
运行server.py,访问127.0.0.0:5000

网页界面虽然丑陋,但是可以正常的进行文件上传识别了。
最后我们检测下天王的人脸:

×