一:简介
face_recognition库是世界上最简洁的人脸识别库,可以使用Python和命令行工具提取、识别、操作人脸。
face_recognition库的人脸识别是基于业内领先的C++开源库 dlib中的深度学习模型,用Labeled Faces in the Wild人脸数据集进行测试,有高达99.38%的准确率。但对小孩和亚洲人脸的识别准确率尚待提升。
对应的github链接:https://github.com/ageitgey/face_recognition
二:安装
1:要求
- Python 3.3+ 或 Python 2.7
- macOS 或 Linux(Windows 不受官方支持,但可能有效,巧了我们要讲的就是在window上的使用,macOS 或 Linux的使用参考上面的链接有详细介绍)
2:在 Windows 上安装
- 首先要先安装dlib库
看了很多的介绍,感觉特别麻烦,我们采用最简单的方法,直接下载对应的dilb的 .whl包直接安装。
dlib对应的whl的网址:Links for dlib

该网站dilb的.whl库支持到cp36,即python3.6,那如果你的python的版本高于3.6去哪里拿呢,我这边也是有的,3.7——3.10版本的都有,下载链接:包含:dlibcp37、38、39、310-Python文档类资源-CSDN下载
- 用pip下载face_recognition库
pip install face_recognition
这个就可以在代码中进行调用了
import face_recognition- 如果下载后face_recognition包引不到
再次用pip的命令执行下载看下,像我这边的显示如下

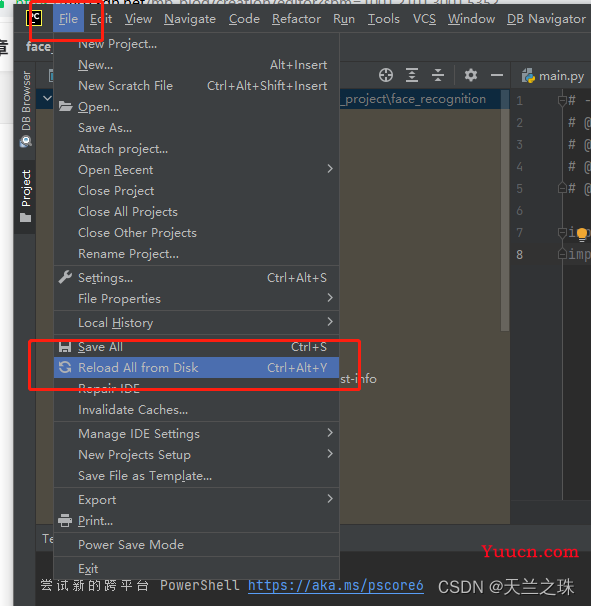
可以看出,其实是已近下载好了,在电脑中打开所在的位置是可以看到face_recognition库的,但在项目的lib下面就是没看到,怎么处理呢,点击file——Reload All from Disk,刷新下内存,就可以了。
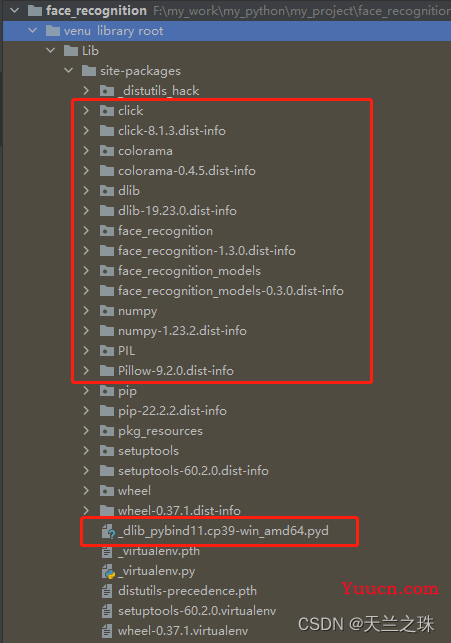
经过上面的操作,在对应的Lib包下面可看到,安装face_recognition库需要依赖很多模块
三:face_recognition库的使用
1:load_image_file加载要识別的人脸图像
- 这个方法主要用于加载要识別的人脸图像,加载返回的数据是 Numpy 数組,记录了图片的所有像素的特征向量。
import face_recognition
# load_image_file 将图像文件(.jpg,.png等)加载到(多维数组)numpy数组中,
# 记录图片的所有像数的特征向量
image = face_recognition.load_image_file('images/img_2.png')
print(image)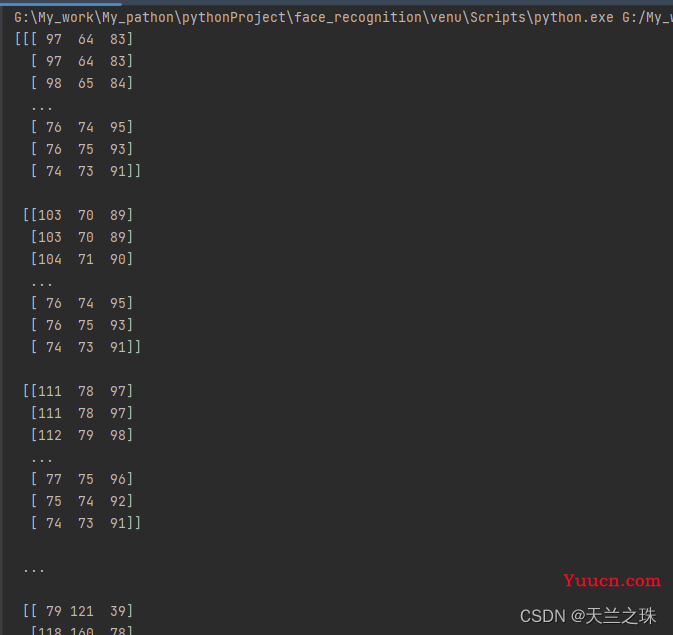
1:face_locations定位图中所有的人脸的像素位置
- 返回值是一个列表形式,列表中每一行是一张人脸的位置信息,包括[top, right, bottom, left],也可以认为每个人脸就是一组元组信息。主要用于标识图像中所有的人脸信息。
具体作用,代码中都有标注,就不一一说明了,图片可随意一张带有人脸的图片,只会识别五官完整的图片,有被遮挡的人脸是无法识别的
import face_recognition
import cv2
# load_image_file 将图像文件(.jpg,.png等)加载到(多维数组)numpy数组中,
# 记录图片的所有像数的特征向量
image = face_recognition.load_image_file('images/img_2.png')
# print(image)
# 通过face_locations方法,得到图像中所有人脸的位置
# 返回值是一个列表形式,列表中每一行是一张人脸的位置信息,包括[top,right,bottom,left],
# 也可以认为每个人脸就是一组元组信息,主要用于标识图像中所有人脸的位置信息
face_locations = face_recognition.face_locations(image)
print(face_locations)
for face_location in face_locations:
    top, right, bottom, left = face_location  # 解包操作,得到图片种每张人脸的四个位置信息
    star = (left, top)
    end = (right, bottom)
    # 在图片上绘制人脸的矩形框,以star开始 end结束,矩形框的颜色(0,0,255) 边框粗细为2
    cv2.rectangle(image, star, end, (0, 0, 255), thickness=2)
#  用cv2 将结果显示在window窗口进行展示
cv2.imshow('window', image)
cv2.waitKey()
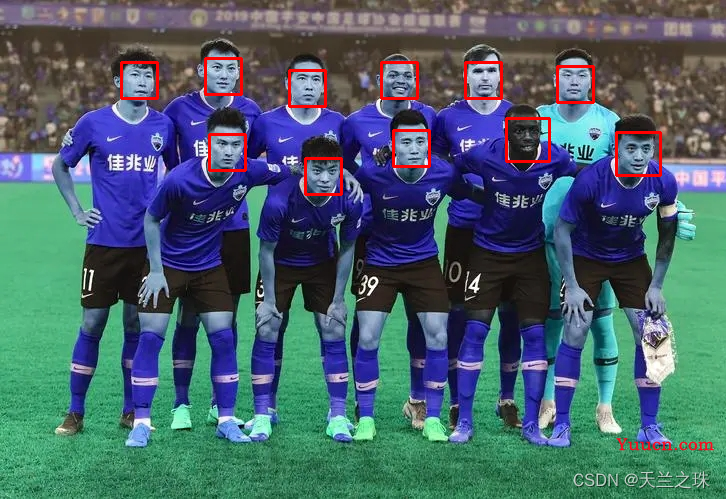
以下11个位置信息,对应底下图片中的11个人脸
[(70, 325, 106, 289), (58, 241, 94, 205), (62, 501, 98, 465), (66, 593, 102, 557),
(62, 157, 98, 121), (130, 429, 166, 393), (134, 245, 170, 209), (62, 417, 98, 381),
 (158, 341, 194, 305), (132, 660, 175, 616), (118, 549, 161, 506)]
2:检测和标记图像中的人脸特征
2.1、68个人脸特征点
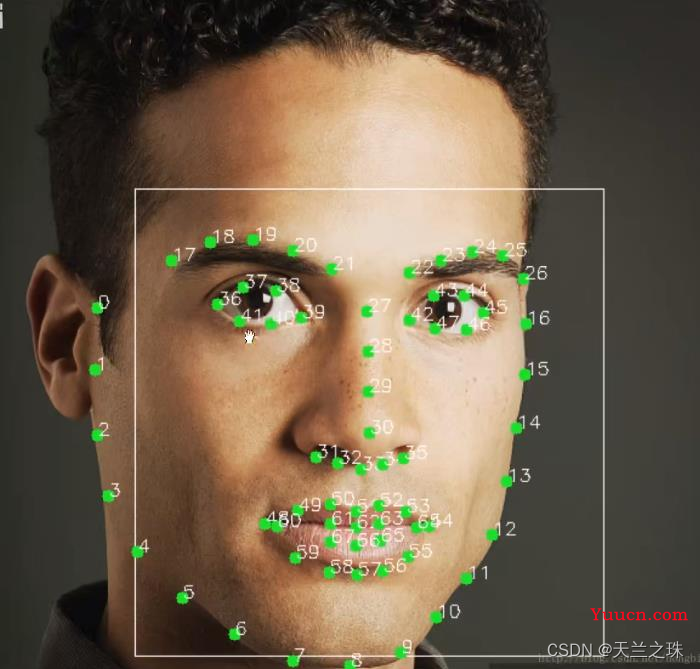 面部特征包含以下几个部分 chin(下巴), left_eyebrow(左眼眉), right_eyebrow'(右眼眉), left_eye(左眼), right_eye(右眼), nose_bridge(鼻梁),nose_tip(鼻下部), bottom_lip(下嘴唇), top_lip(上嘴唇)
2.2、face_landmarks 识别人脸关键特征点。
- 参数仍然是待检测的图像对象,返回值是包含面部特征点字典的列表,列表长度就是图像中的人脸数
- 面部特征包含以下几个部分 chin(下巴), left_eyebrow(左眼眉), right_eyebrow'(右眼眉), left_eye(左眼), right_eye(右眼), nose_bridge(鼻梁),nose_tip(鼻下部), bottom_lip(下嘴唇), top_lip(上嘴唇)
- 勾勒脸部大体轮廓
import face_recognition
# load_image_file 主要用于加载要识别的人脸图像,加载返回的数据是(多维数组)Numpy数组,记录图片的所有像数的特征向量
image = face_recognition.load_image_file('images/img.png')
face_landmarks_list = face_recognition.face_landmarks(image)
print(face_landmarks_list)
通过该方法可找出人脸对应的68个人脸特征点的向量,参数是待检测的图像,返回值包含面部特征点字典的列表,列表长度就是图像中的人脸数,下面展示的是一张人脸的特征信息
[{
'chin': [(176, 164), (179, 188), (185, 210), (190, 232), (198, 254), (209, 274),
         (225, 291), (246, 302), (268, 304), (290, 299), (310, 284), (326, 266),
         (338, 245), (345, 223), (347, 199), (349, 176), (350, 153)],
'left_eyebrow': [(184, 150), (196, 141), (213, 140), (229, 143), (246, 149)],
'right_eyebrow': [(273, 149), (289, 140), (305, 135), (322, 134), (336, 142)],
'nose_bridge': [(261, 163), (262, 180), (263, 197), (264, 213)],
'nose_tip': [(251, 224), (257, 226), (265, 229), (272, 226), (279, 222)],
'left_eye': [(204, 168), (213, 160), (227, 160), (238, 169), (226, 173), (213, 173)],
'right_eye': [(286, 167), (295, 157), (309, 156), (319, 162), (310, 169), (297, 169)],
'top_lip': [(231, 250), (244, 245), (257, 241), (265, 244), (273, 241), (285, 244),
            (298, 248), (292, 250), (274, 252), (266, 253), (257, 253), (237, 252)],
'bottom_lip': [(298, 248), (286, 261), (274, 267), (266, 268), (256, 268), (244, 263),
               (231, 250), (237, 252), (257, 253), (265, 254), (273, 252), (292, 250)]}]
用代码将特征点在图片上勾勒显示:
import face_recognition
from PIL import Image, ImageDraw
# load_image_file 主要用于加载要识别的人脸图像,加载返回的数据是(多维数组)Numpy数组,记录图片的所有像数的特征向量
image = face_recognition.load_image_file('images/yml.png')
face_landmarks_list = face_recognition.face_landmarks(image)
# print(face_landmarks_list)
pil_image = Image.fromarray(image)
d = ImageDraw.Draw(pil_image)  # 生成一张pil图像
for face_landmarks in face_landmarks_list:
    facial_features = [
        'chin',
        'left_eyebrow',
        'right_eyebrow',
        'left_eye',
        'right_eye',
        'nose_bridge',
        'nose_tip',
        'bottom_lip',
        'top_lip'
    ]
    for facial_feature in facial_features:
        # print("{}每个人的面部特征显示在以下位置:{}".format(facial_feature,face_landmarks[facial_feature]))
        # 调用pil的line方法,绘制所有特征点
        d.line(face_landmarks[facial_feature], width=2)
pil_image.show()
结果展示:

3:face_encodings 获取图像文件中所有面部编码信息
- 返回值是一个编码列表,参数仍然是要识别的图像对象,如果后续访问时需要加上索引或遍历进行访问,每张人脸的编码信息时一个128维向量
- 面部编码信息时进行人像识别的重要参数
import face_recognition
# load_image_file 主要用于加载要识别的人脸图像,加载返回的数据是(多维数组)Numpy数组,记录图片的所有像数的特征向量
image = face_recognition.load_image_file('images/img.png')
face_encodings = face_recognition.face_encodings(image)
for face_encoding in face_encodings:
print("信息编码长度为:{}\n编码信息为:{}".format(len(face_encoding), face_encoding)) 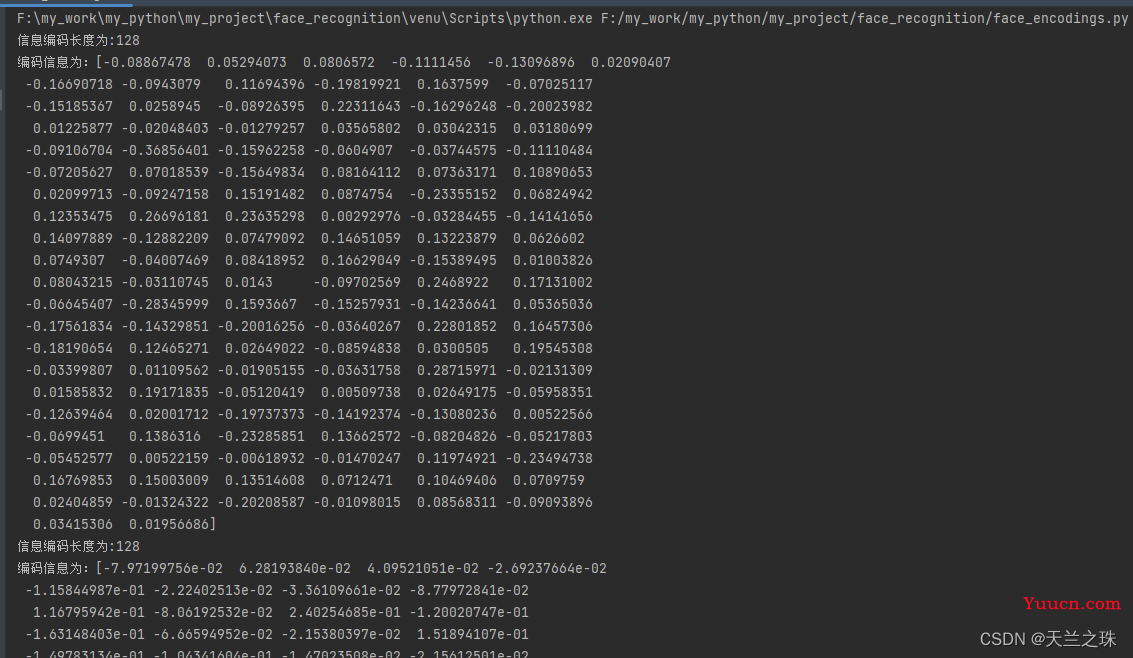
4:compare_faces 由面部编码信息进行面部识别匹配
- 主要用于匹配两个面部特征编码,利用这两个特征向量的内积来衡量相似度,根据阈值确认是否是同一个人。
- 第一个参数就是一个面部编码列表(很多张脸), 第二个参数就是给出单个面部编码(一张脸), compare_faces 会将第二个参数中的编码信息与第一个参数中的所有编码信息依次匹配,返回值是一个布尔列表,匹配成功则返回 True,匹配失败则返回 False,顺序与第一个参数中脸部编码顺序一致。
- 参数里有一个 tolerance值,大家可以根据实际的效果进行调整,一般经验值是 0.39。tolerance 值越小,匹配越严格。
import face_recognition
# 加载一张合照
image1 = face_recognition.load_image_file('images/yml.png')
# 加载一张单人照
image2 = face_recognition.load_image_file('images/yami.png')
# 获取多人图片的面部编码信息
known_face_encodings = face_recognition.face_encodings(image1)
# 要进行识别的单张图片的特征   只需要拿到第一个人脸的编码信息
compare_face_encoding = face_recognition.face_encodings(image2)[0]
# 注意第二个参数,只能是单个面部特征编码,不能列表
matches = face_recognition.compare_faces(known_face_encodings, compare_face_encoding, tolerance=0.39)
print(matches)
5:识别图像中对应的人脸
import face_recognition
import cv2
def compareFaces(known_image, name):
    known_face_encoding = face_recognition.face_encodings(known_image)[0]
    for i in range(len(face_locations)):  # face_Locations的长度就代表有多少张脸
        top1, right1, bottom1, left1 = face_locations[i]
        face_image = unknown_image[top1:bottom1, left1:right1]
        face_encoding = face_recognition.face_encodings(face_image)
        if face_encoding:
            result = {}
            matches = face_recognition.compare_faces([unknown_face_encodings[i]], known_face_encoding, tolerance=0.39)
            if True in matches:
                print('在未知图片中找到了已知面孔')
                result['face_encoding'] = face_encoding
                result['is_view'] = True
                result['location'] = face_locations[i]
                result['face_id'] = i + 1
                result['face_name'] = name
                results.append(result)
                if result['is_view']:
                    print('已知面孔匹配照片上的第{}张脸!!'.format(result['face_id']))
unknown_image = face_recognition.load_image_file('images/yml.png')
known_image1 = face_recognition.load_image_file('images/yami.png')
known_image2 = face_recognition.load_image_file('images/lkw.png')
results = []
unknown_face_encodings = face_recognition.face_encodings(unknown_image)
face_locations = face_recognition.face_locations(unknown_image)
compareFaces(known_image1, 'yami')
compareFaces(known_image2, 'lkw')
view_faces = [i for i in results if i['is_view']]
if len(view_faces) > 0:
    for view_face in view_faces:
        top, right, bottom, left = view_face['location']
        start = (left, top)
        end = (right, bottom)
        cv2.rectangle(unknown_image, start, end, (0, 0, 255), thickness=2)
        font = cv2.FONT_HERSHEY_DUPLEX
        cv2.putText(unknown_image, view_face['face_name'], (left+6, bottom+16), font, 1.0, (255, 255, 255), thickness=1)
cv2.imshow('windows', unknown_image)
cv2.waitKey()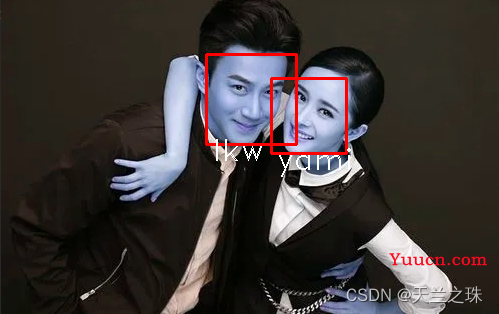
下篇文章,介绍下人脸识别、活体检测的实现